How to Deploy a Static Website to S3 With AWS CodePipeline
A step-by-step implementation of automated deployments using AWS CodePipeline, S3 static website hosting, and GitHub integration. This project demonstrates CI/CD pipeline creation, IAM security configuration, and version-controlled deployments - replacing traditional FTP uploads with a zero-touch solution.
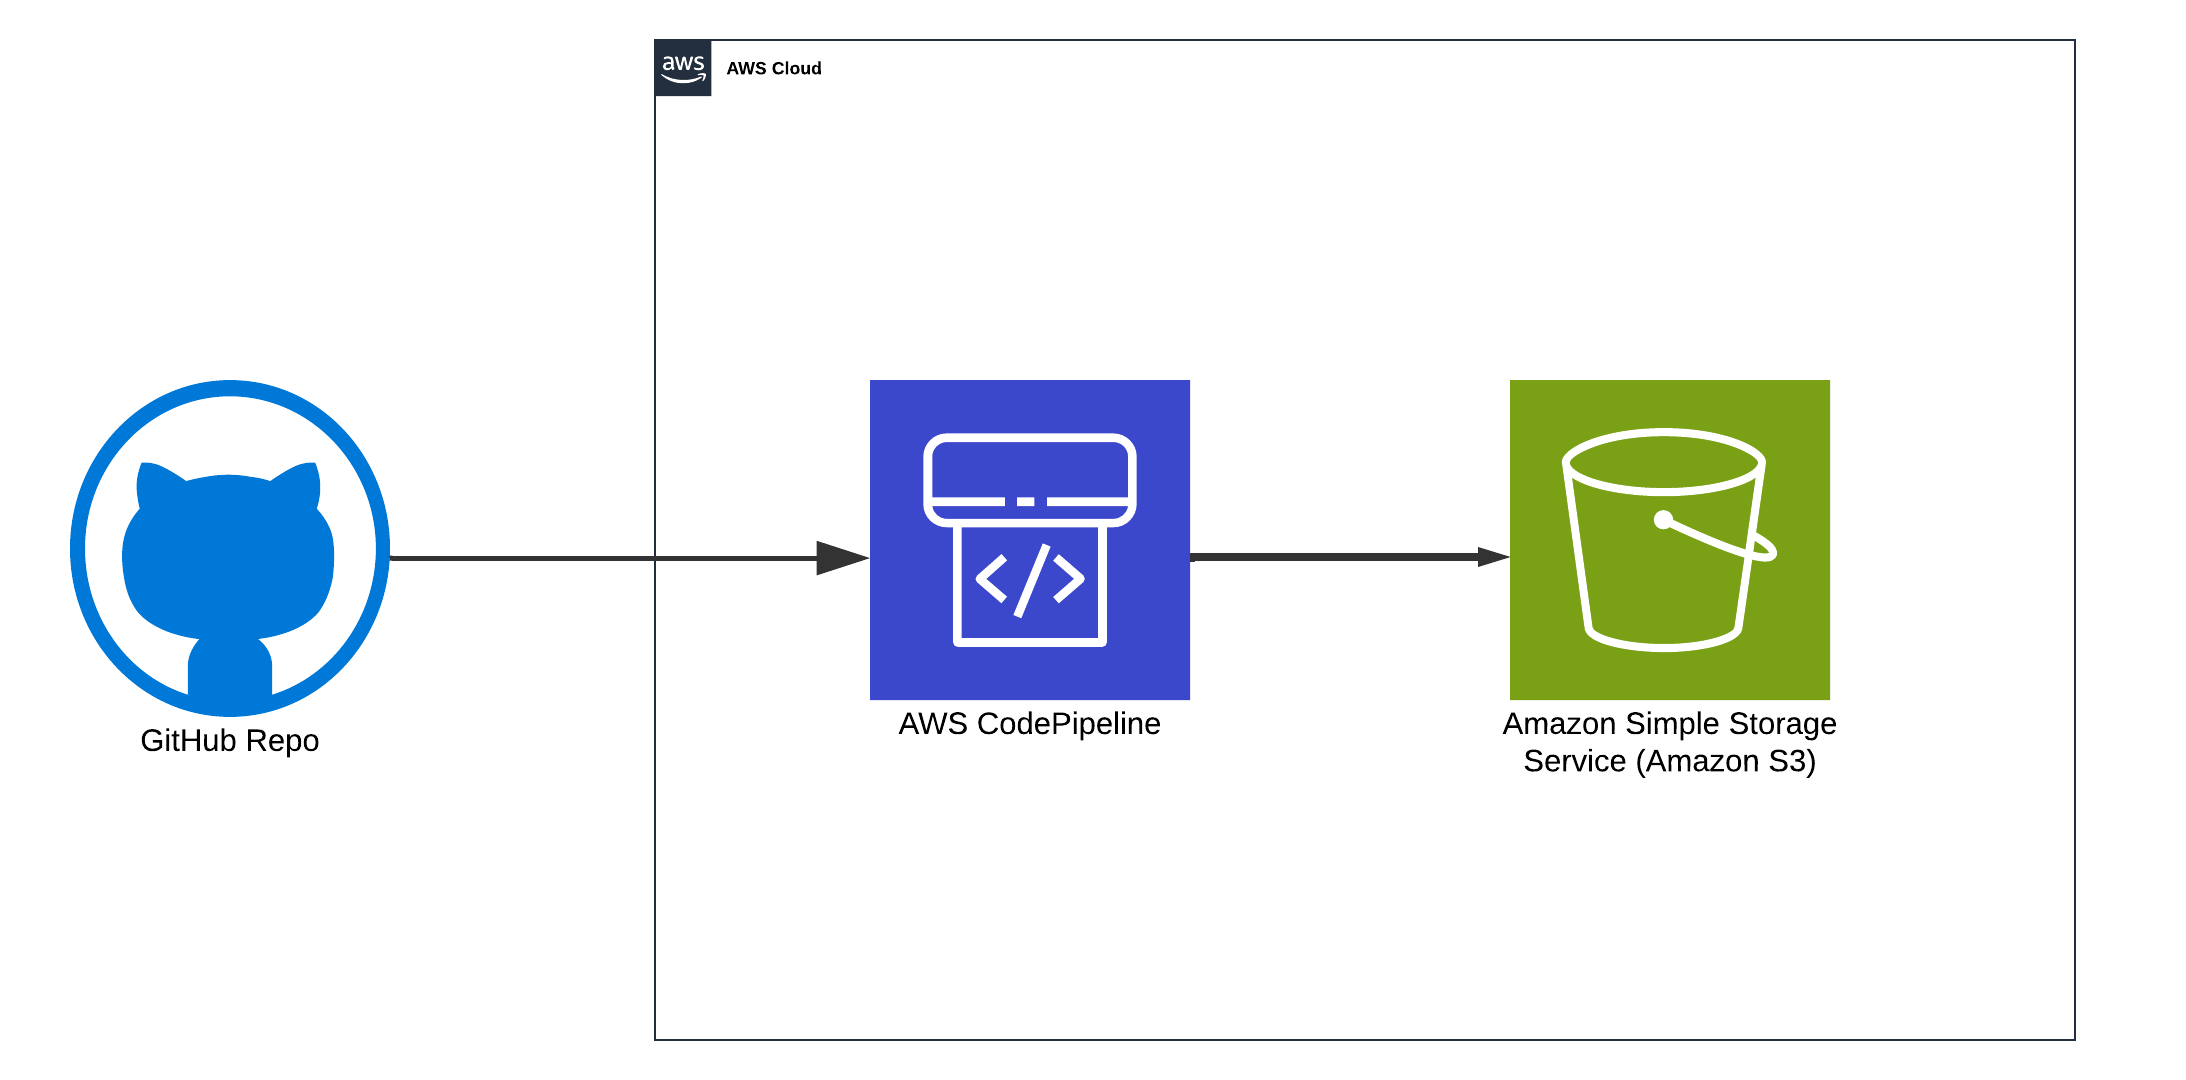
AWS CodePipeline to S3 Architecture Overview
Why Automate Static Website Deployment With CodePipeline
Benefits of Automated S3 Deployment
- Zero Manual Intervention: Automates the deployment process.
- Complete Deployment History: Maintains a detailed record of all deployments.
- Quick Rollback Capability: Easily revert to previous versions if needed.
- Secure Access Control: Uses IAM roles to manage permissions securely.
- Reduced Human Error: Minimizes mistakes associated with manual uploads.
The Problem With Manual FTP Deployments
Your retail company currently maintains its static website content on-premises, relying on manual FTP uploads for updates. This manual approach often results in incomplete or inconsistent deployments, making it difficult to maintain a reliable version history or roll back changes when issues arise. With holiday promotions driving sudden traffic spikes, the site frequently struggles under the burden of rushed, ad-hoc updates—leading to downtime, frustrated customers, and missed revenue opportunities.
By introducing a fully automated CI/CD pipeline, you can eliminate the need for FTP uploads, ensure a consistent deployment history, and improve your site’s resiliency, especially during critical high-traffic periods.
Common FTP Deployment Issues CodePipeline Solves
- Incomplete Uploads: Can break the website if files aren’t fully uploaded.
- Lack of Deployment History: No records of what was deployed and when.
- Change Tracking: Difficult to identify who made specific changes.
- No Rollback Capability: Unable to revert to previous versions easily.
- Security Vulnerabilities: FTP lacks robust security measures, exposing the site to potential threats.
How AWS CodePipeline Automates S3 Deployments
What You Will Learn in This CodePipeline Tutorial
- Automated Deployments: Eliminate the risks associated with FTP.
- Version Control: Provides a comprehensive deployment history.
- IAM Roles: Ensure secure access and permissions management.
- S3 Static Hosting: Enables reliable and scalable content delivery.
- CodePipeline Automation: Streamlines the entire deployment process from source to deployment.
While many tutorials jump straight to CloudFront and custom domains, let’s focus on the fundamental problem: automating deployments reliably.
Instead of manually uploading files to S3, this guide demonstrates a true zero-touch process. We’ll start with an empty S3 bucket and let CodePipeline handle the entire deployment lifecycle.
Step-by-Step: Setting Up AWS CodePipeline With S3
Step 1: Connect GitHub Repository to CodePipeline
Create your HTML file by running the following command in your repository:
touch index.html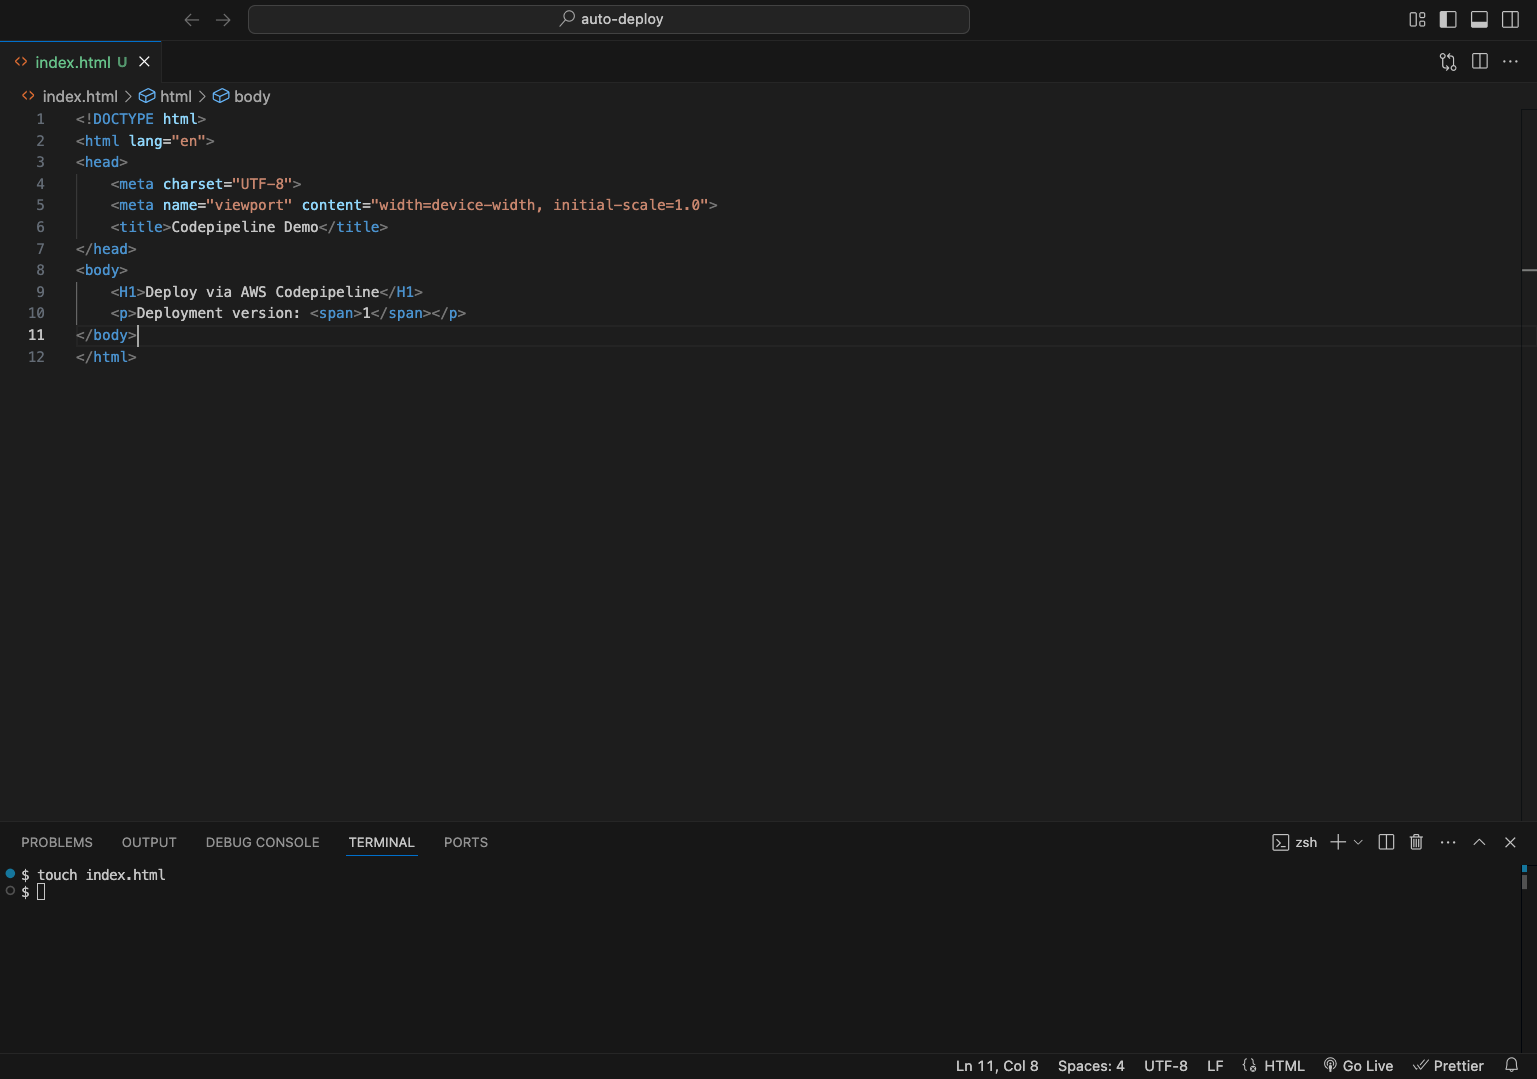
Copy and paste the provided HTML code:
<!DOCTYPE html>
<html lang="en">
<head>
    <meta charset="UTF-8">
    <meta name="viewport" content="width=device-width, initial-scale=1.0">
    <title>Codepipeline Demo</title>
</head>
<body>
    <H1>Deploy via AWS Codepipeline</H1>
    <p>Deployment version: <span>1</span></p>
</body>
</html>
Push your code to your repo.
Step 2: Configure S3 Bucket for Static Website Hosting
First, create an S3 bucket with static website hosting:
In the AWS Console Search “S3”.
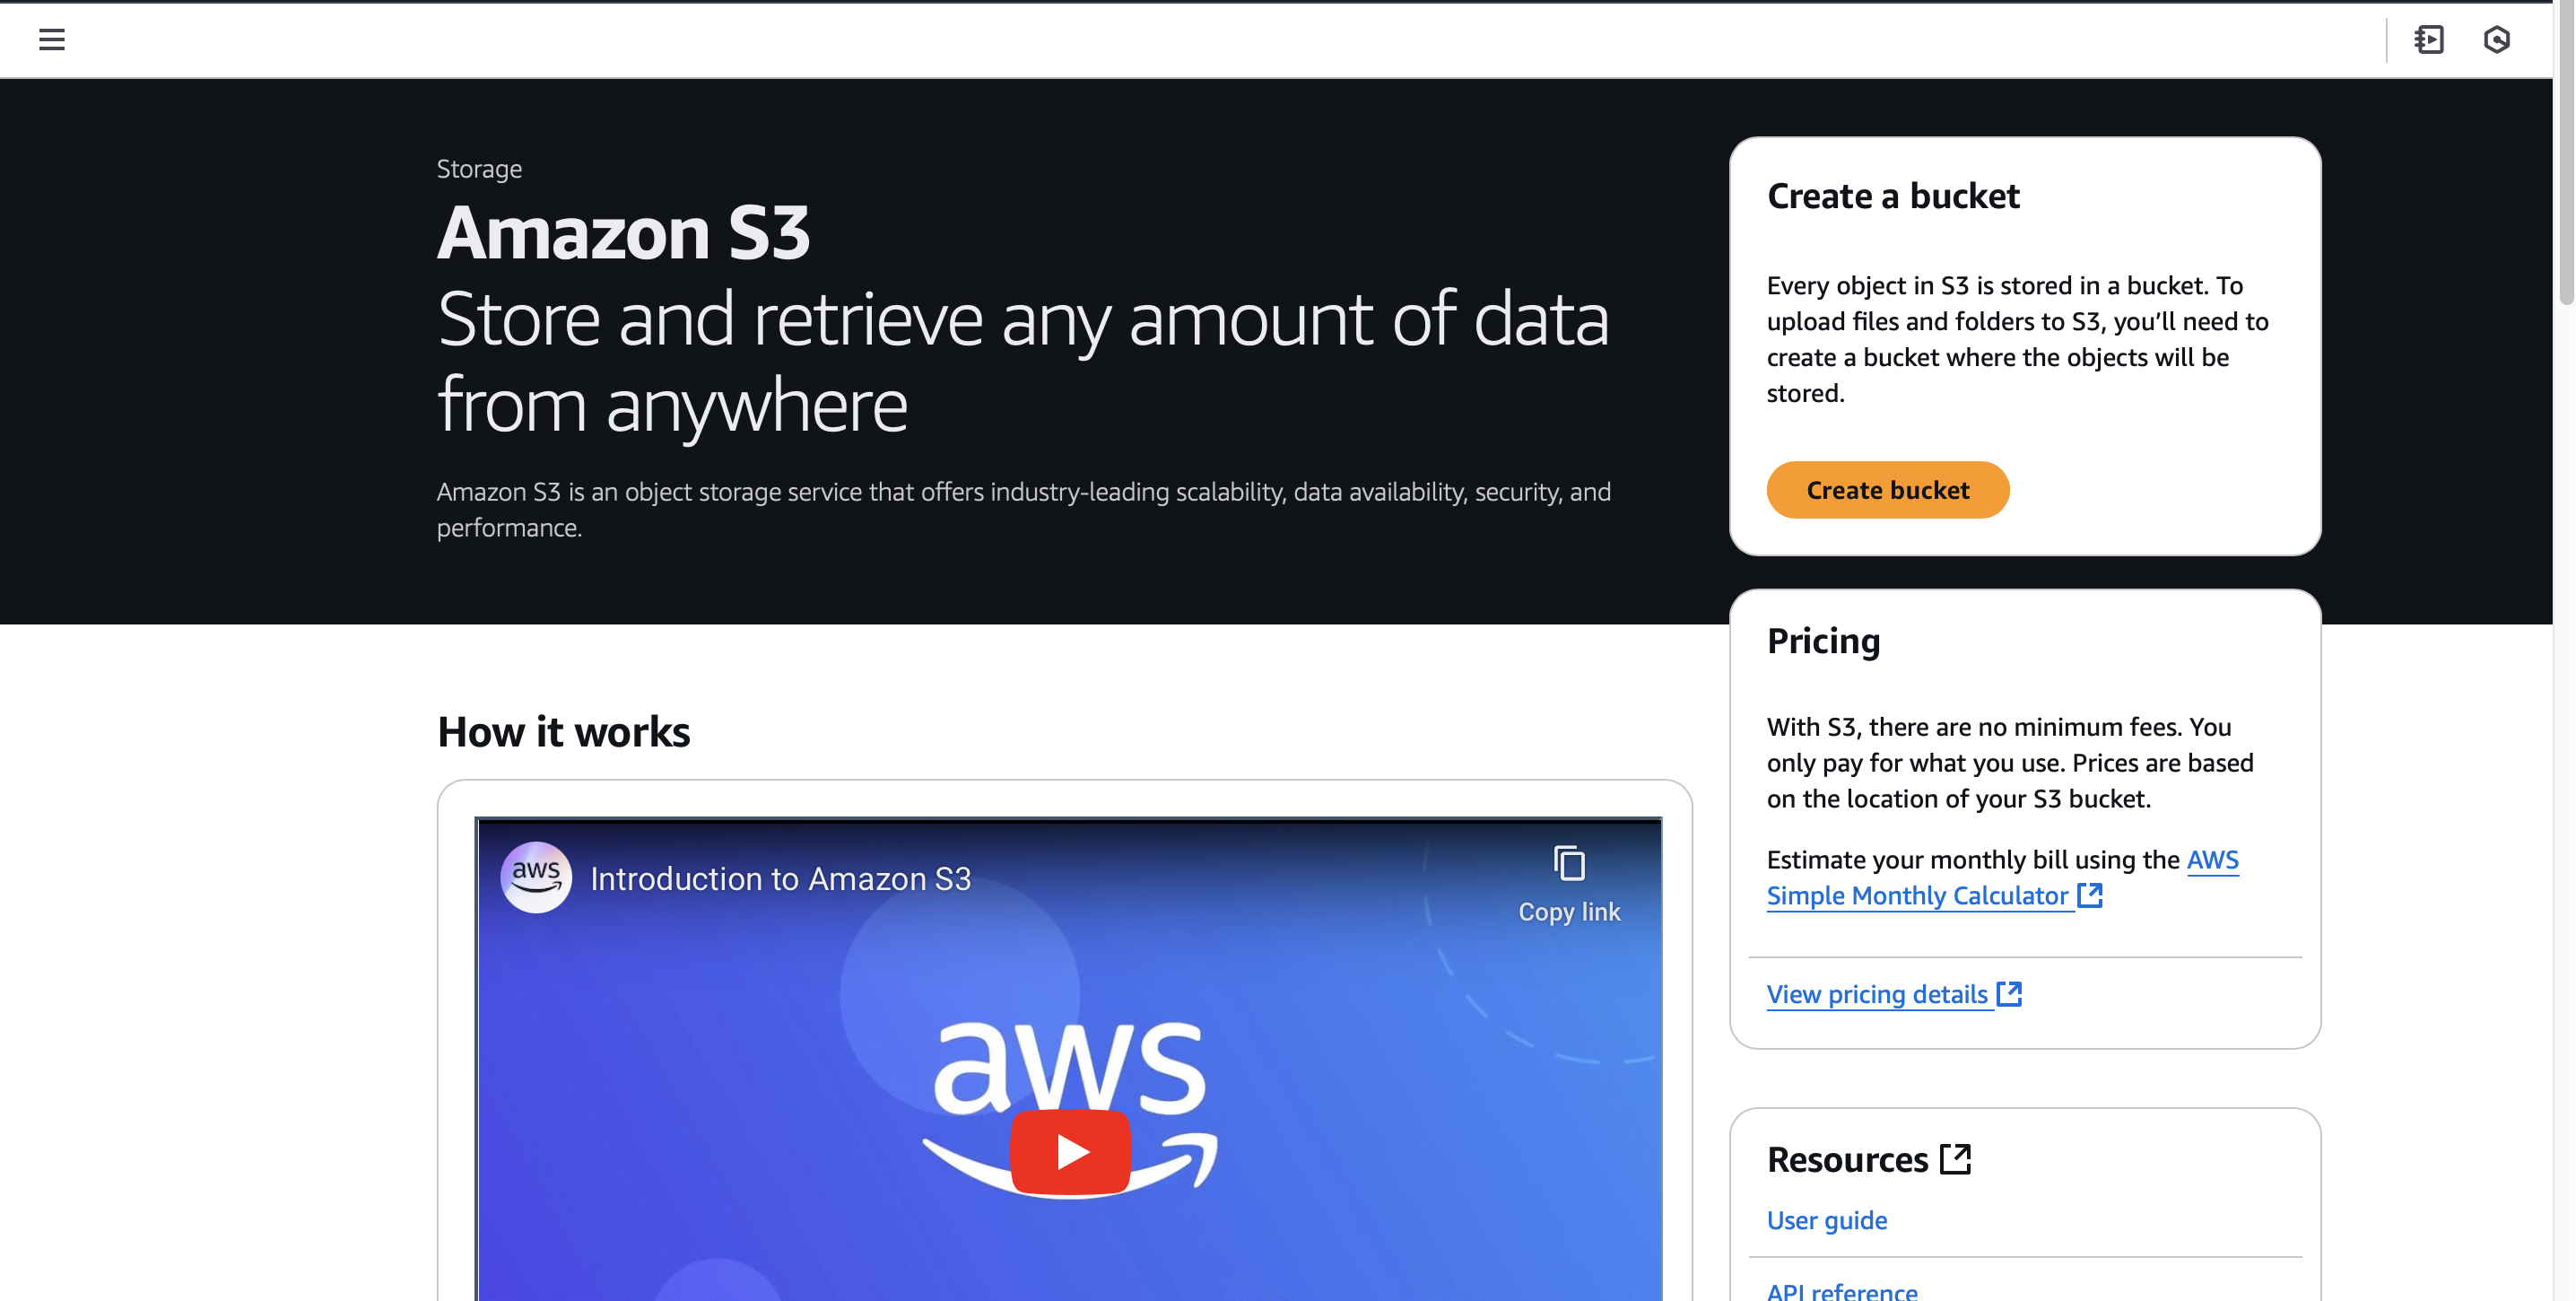
Click the “Create Bucket” button.
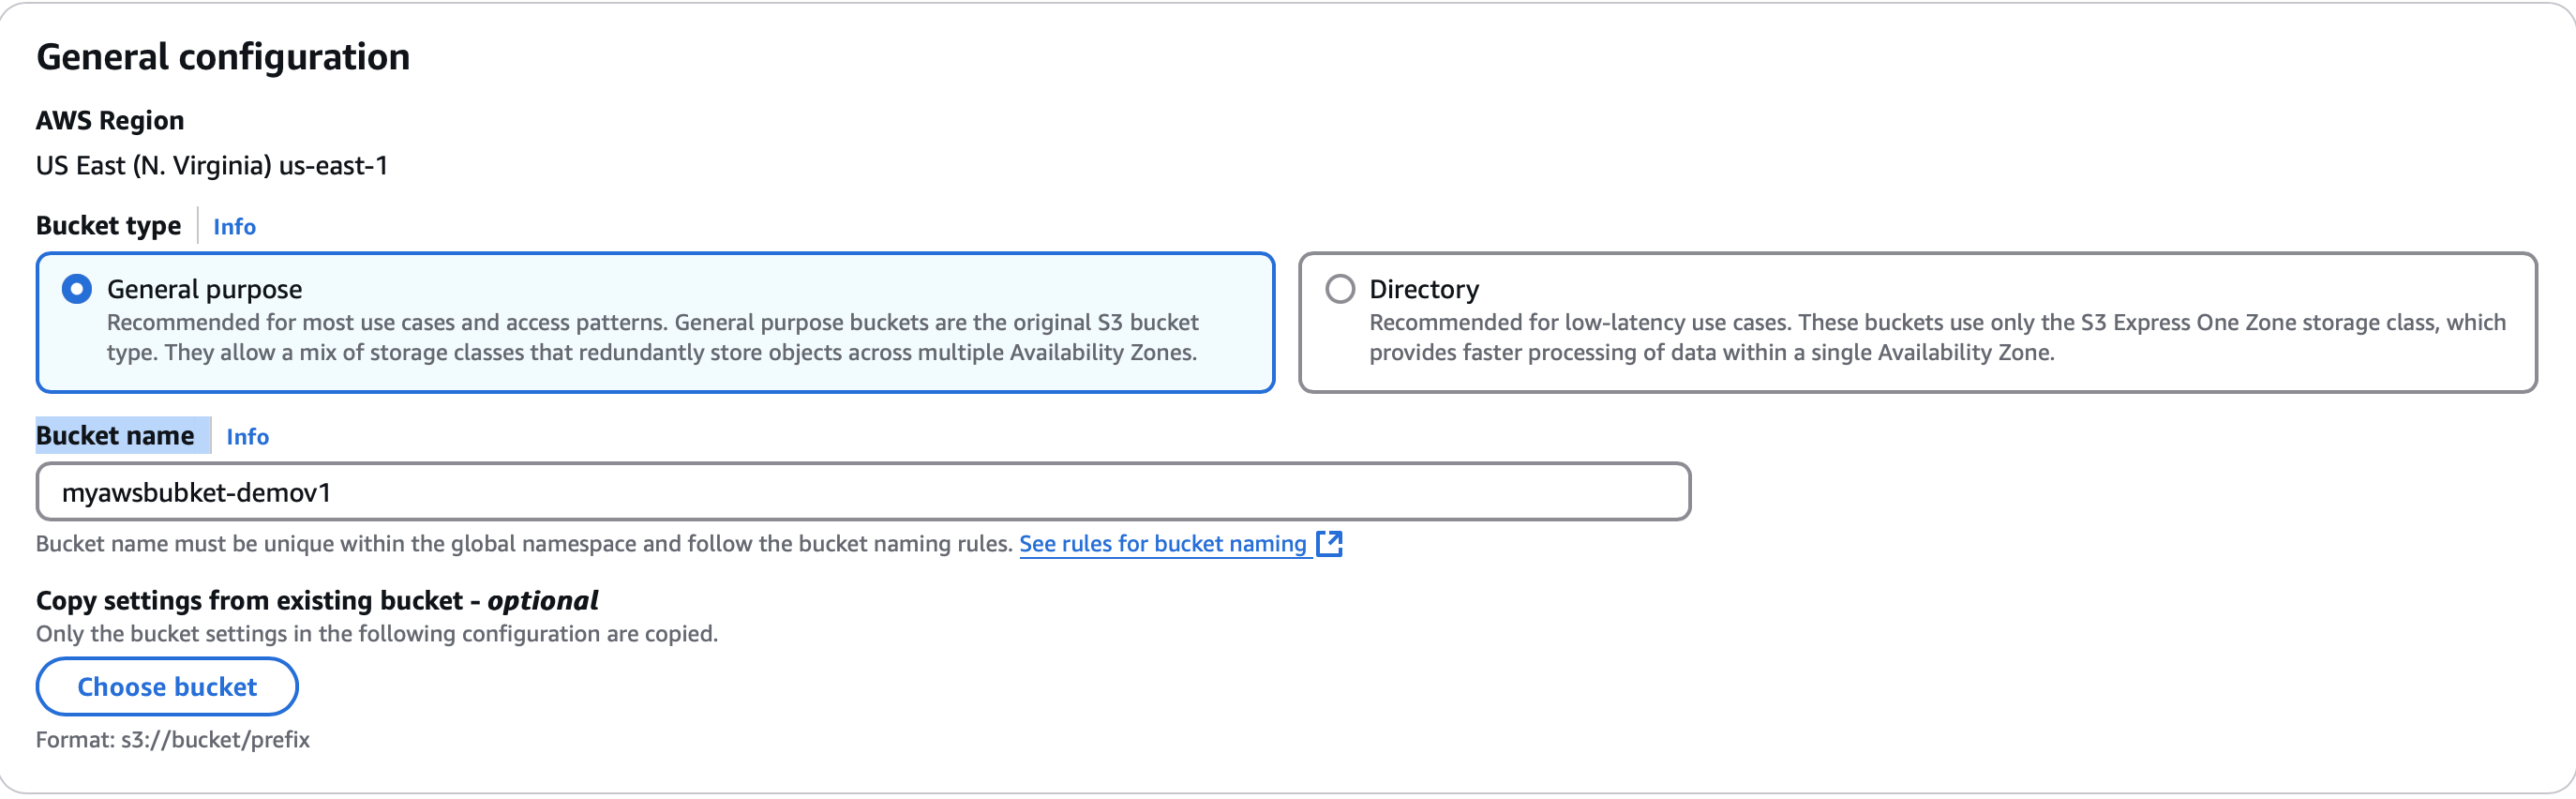
Bucket Name: myawsbucket-demov1 (ensure the name is unique).
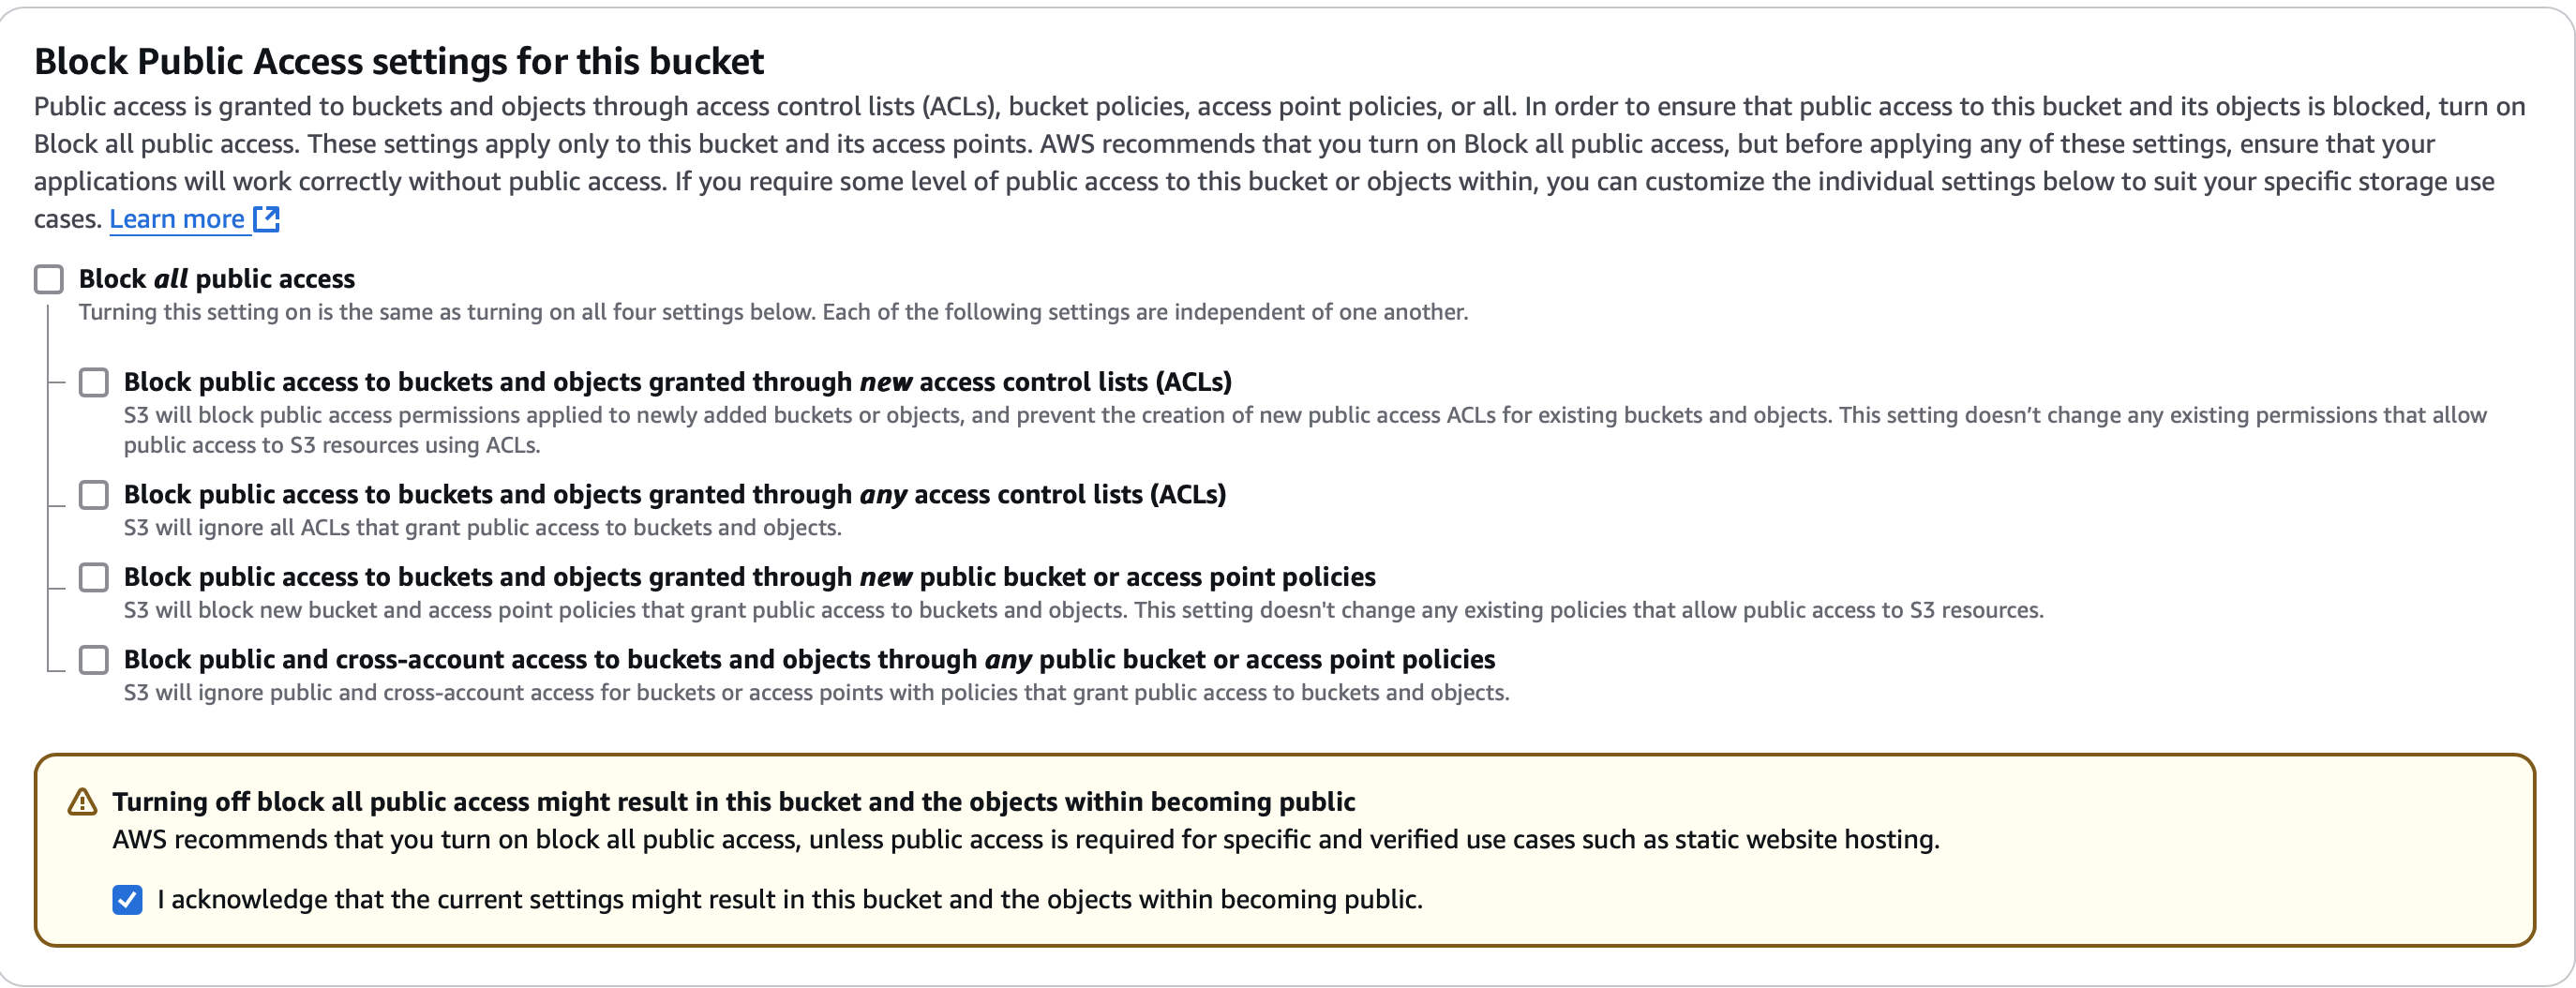
Keep Default settings except:
- Uncheck the box: Block All Public Access.
- Acknowledge the previous selection to Enable Public Access.
- Bucket Versioning: Enable.

Enable Versioning (we are simulating a company its important to have versioning enabled for accidental deletes and to track history of changes)
Accept the remaining defaults and create the bucket.
Enable S3 Static Website Hosting
After creating your bucket, select it and navigate to the Properties tab. Scroll down to Static website hosting and click Edit.
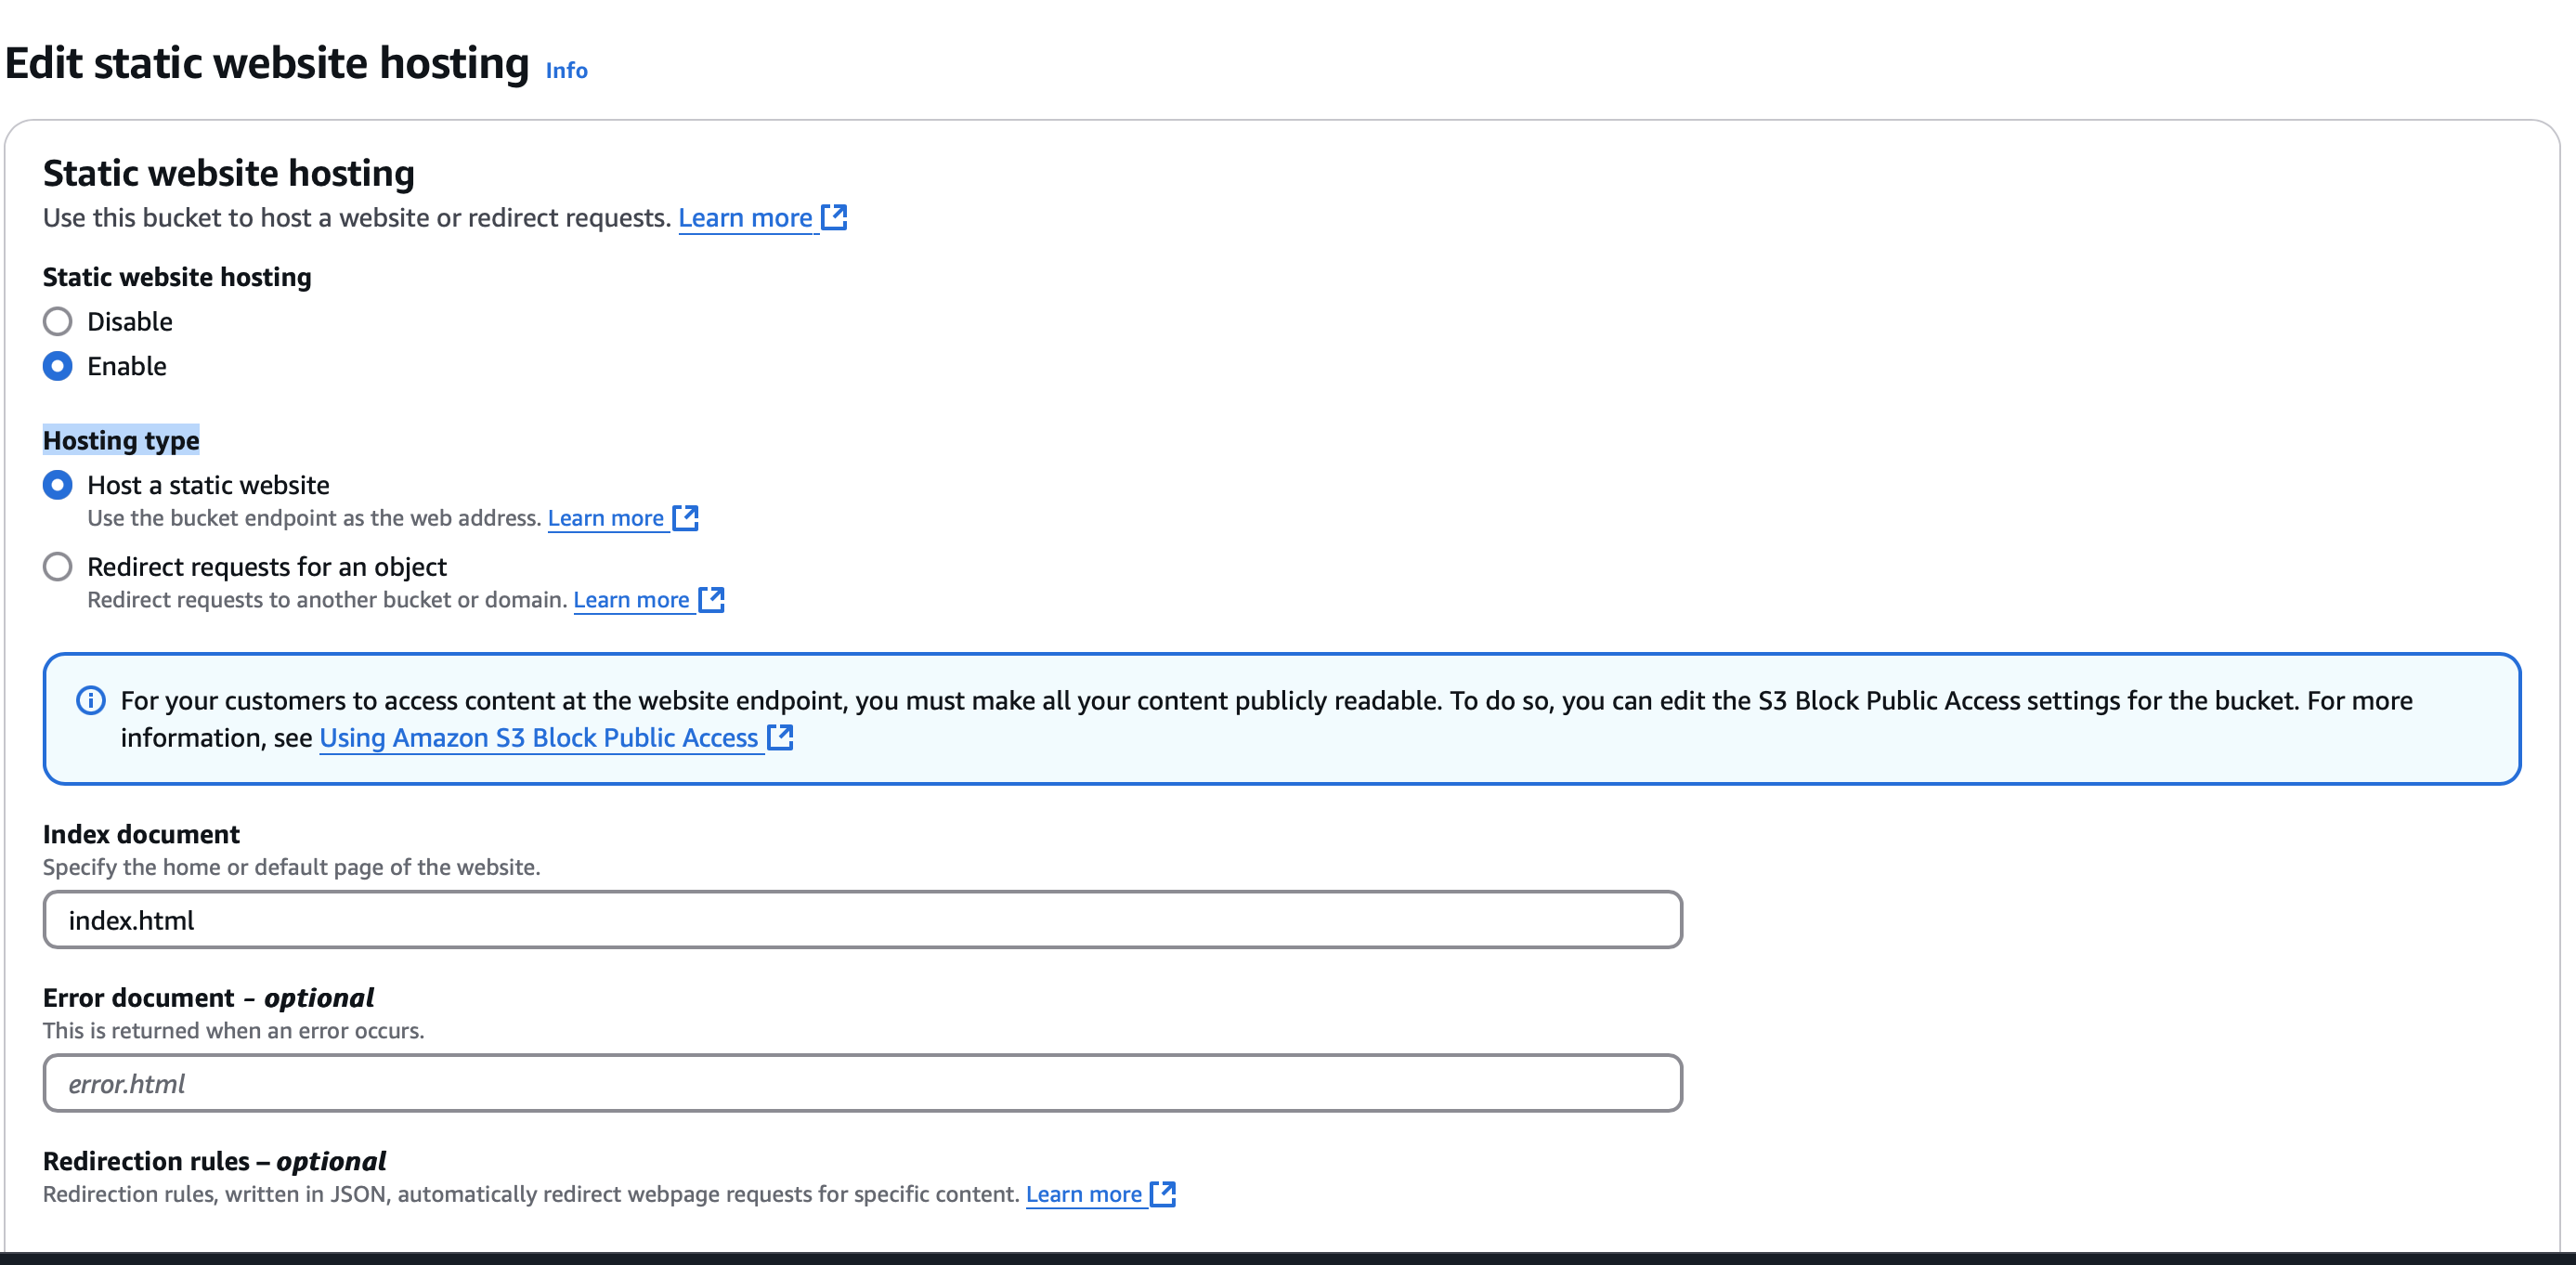
- Static website hosting: enable
- Hosting type: Host a static website
- Index document: index.html
- Save Changes
We Have created a bucket but we don’t have the necessary permissions to access the items in the bucket.
Configure S3 Bucket Policy for Public Access
Navigate to the Permissions tab and scroll to Bucket Policy.
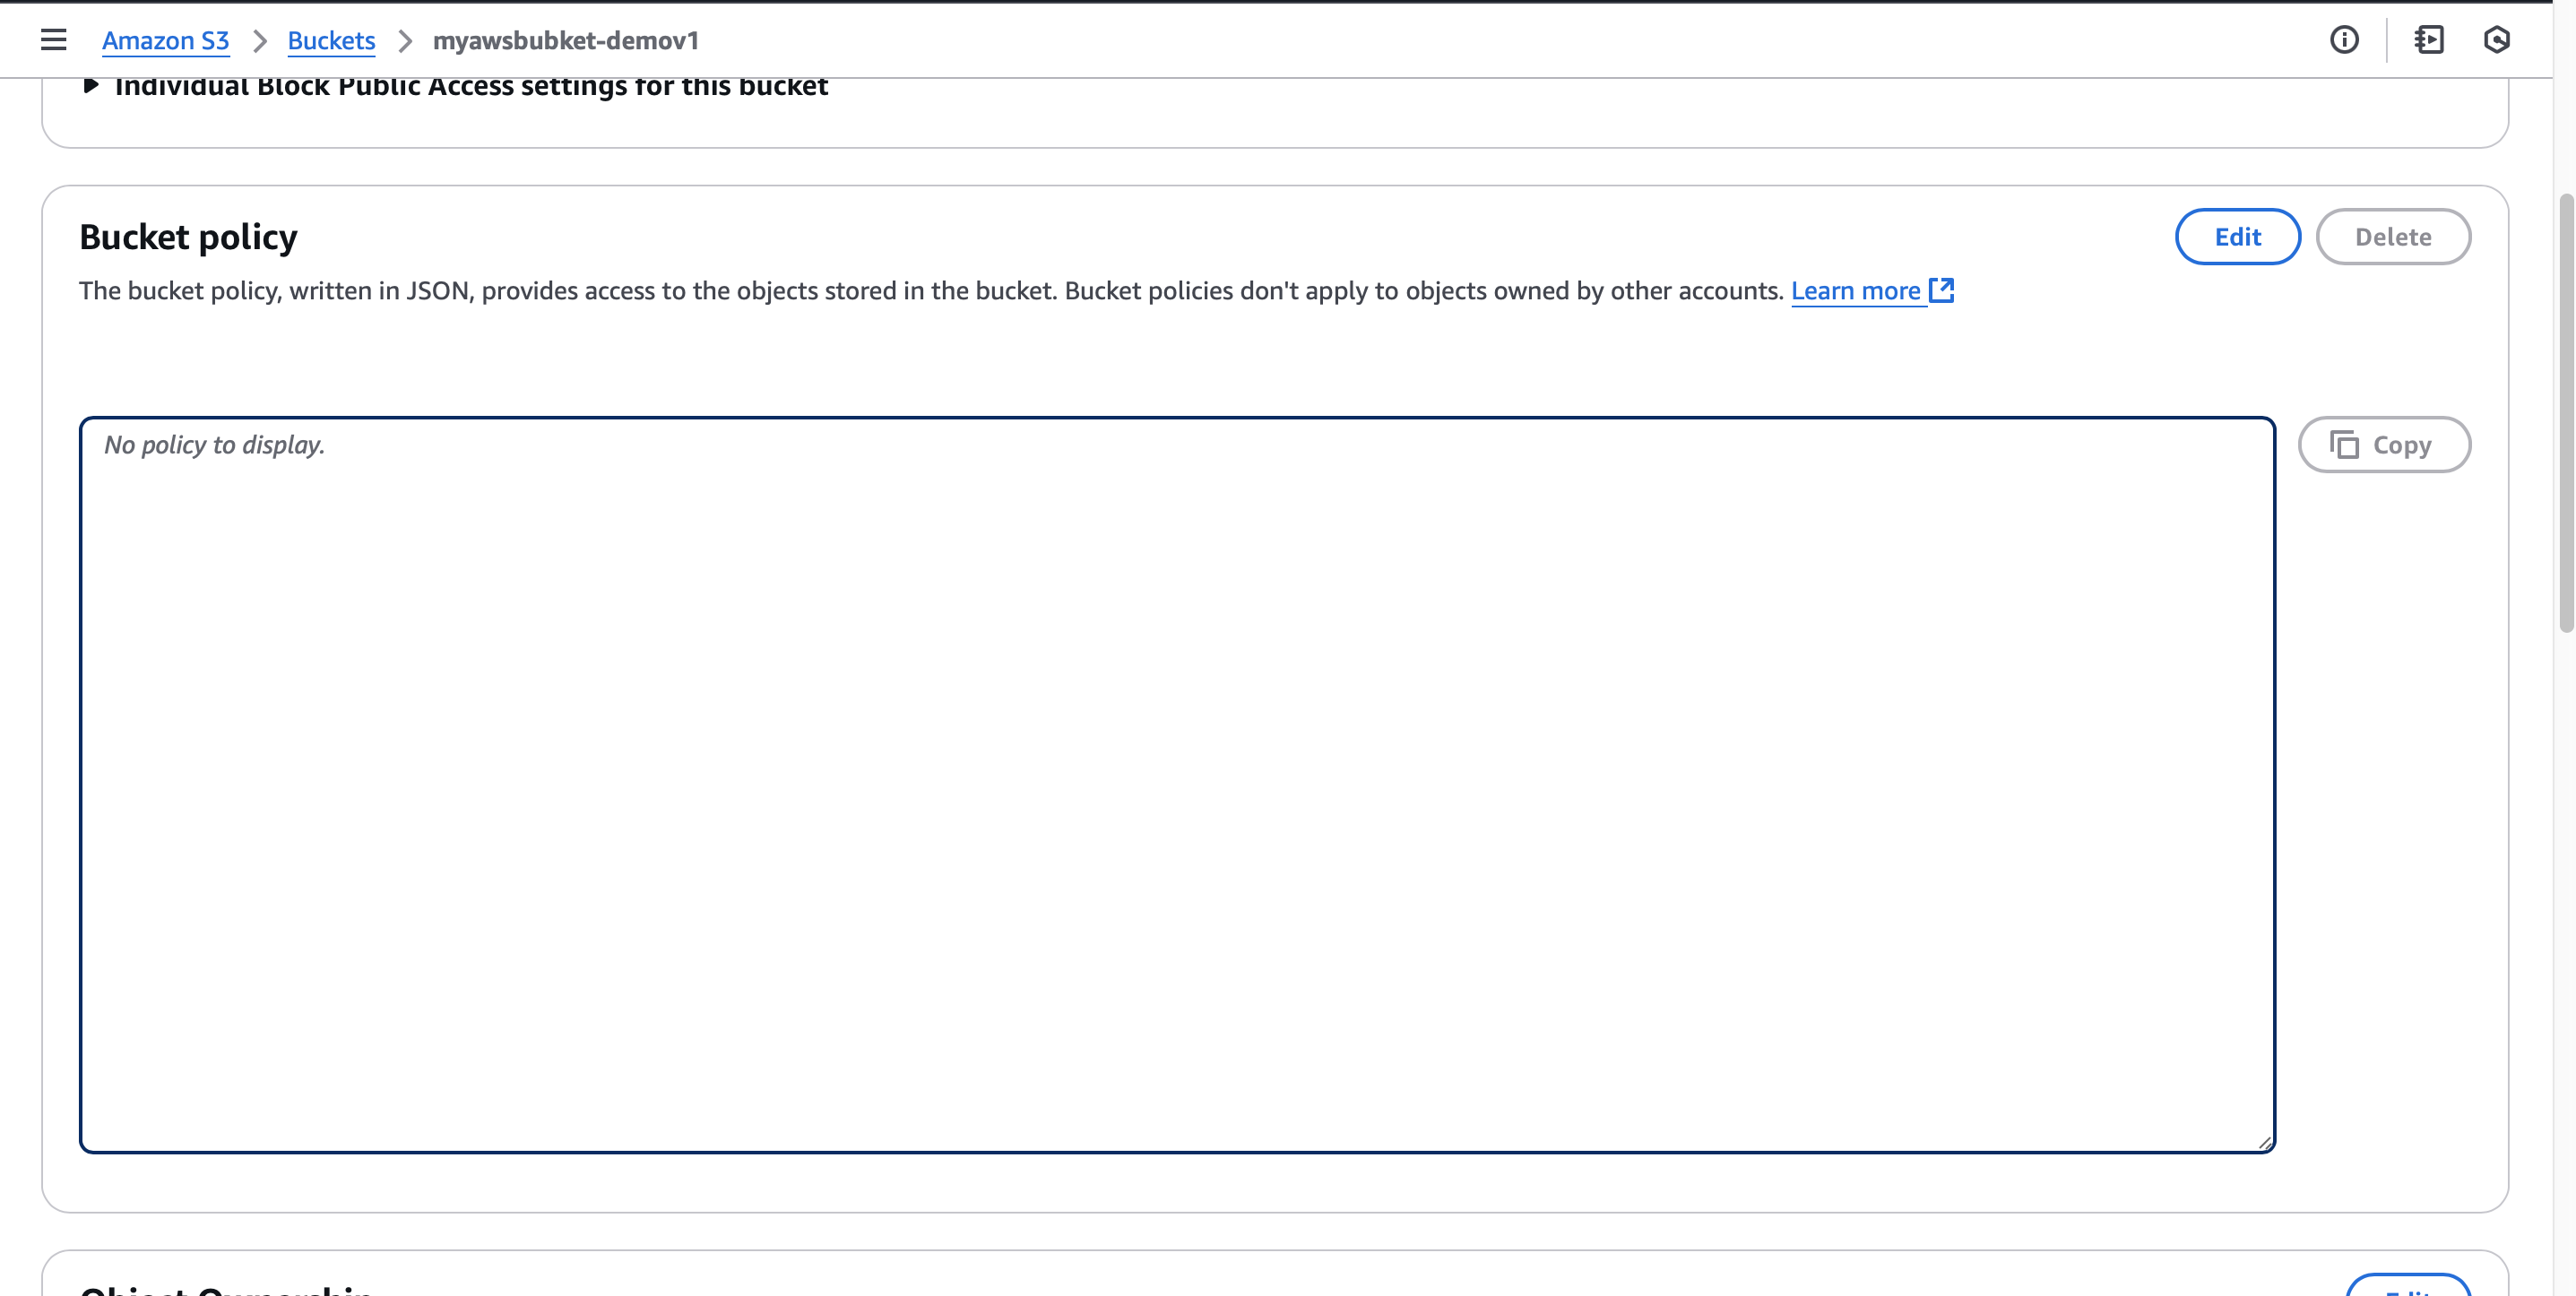
Click Edit and add the following policy to grant public read access to your objects:
{
    "Version": "2012-10-17",
    "Statement": [
        {
            "Sid": "PublicReadGetObject",
            "Effect": "Allow",
            "Principal": "*",
            "Action": [
                "s3:GetObject"
            ],
            "**Resource**": "arn:aws:s3:::my-bucket/*"
        }
    ]
}
Adapt the Resource to match your bucket name, then save changes.
Step 3: Create an AWS CodePipeline for S3 Deployment
In the AWS Console, search for and select CodePipeline.
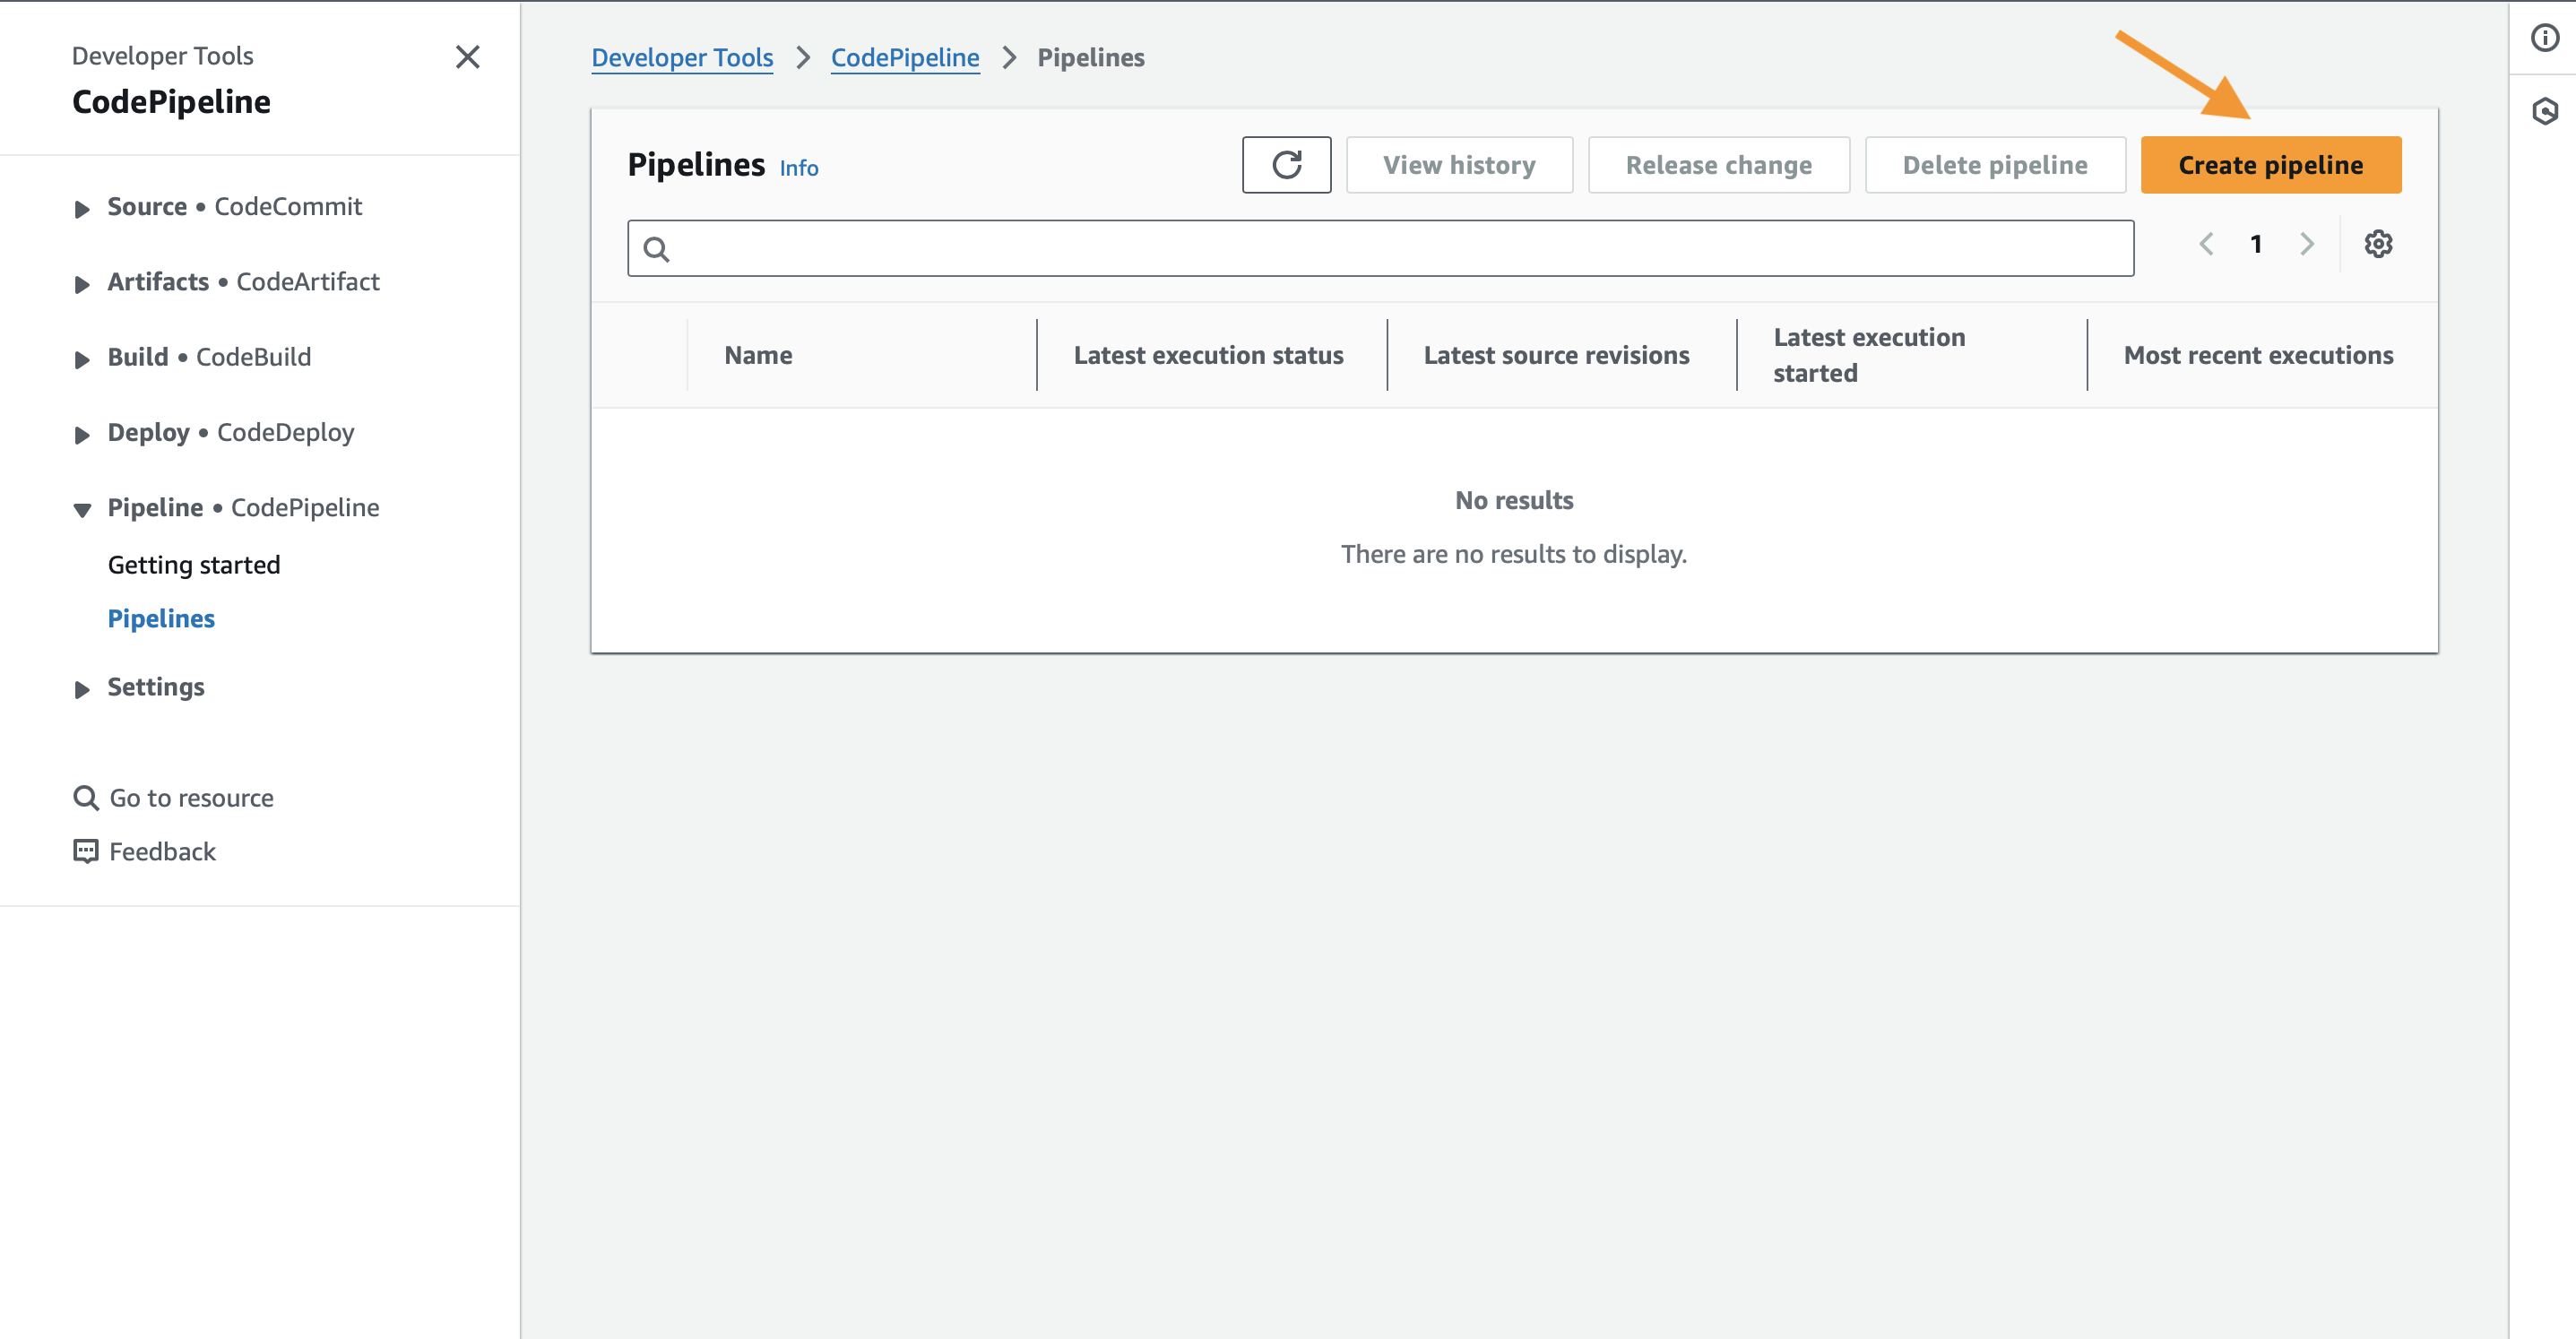
Click Create Pipeline.
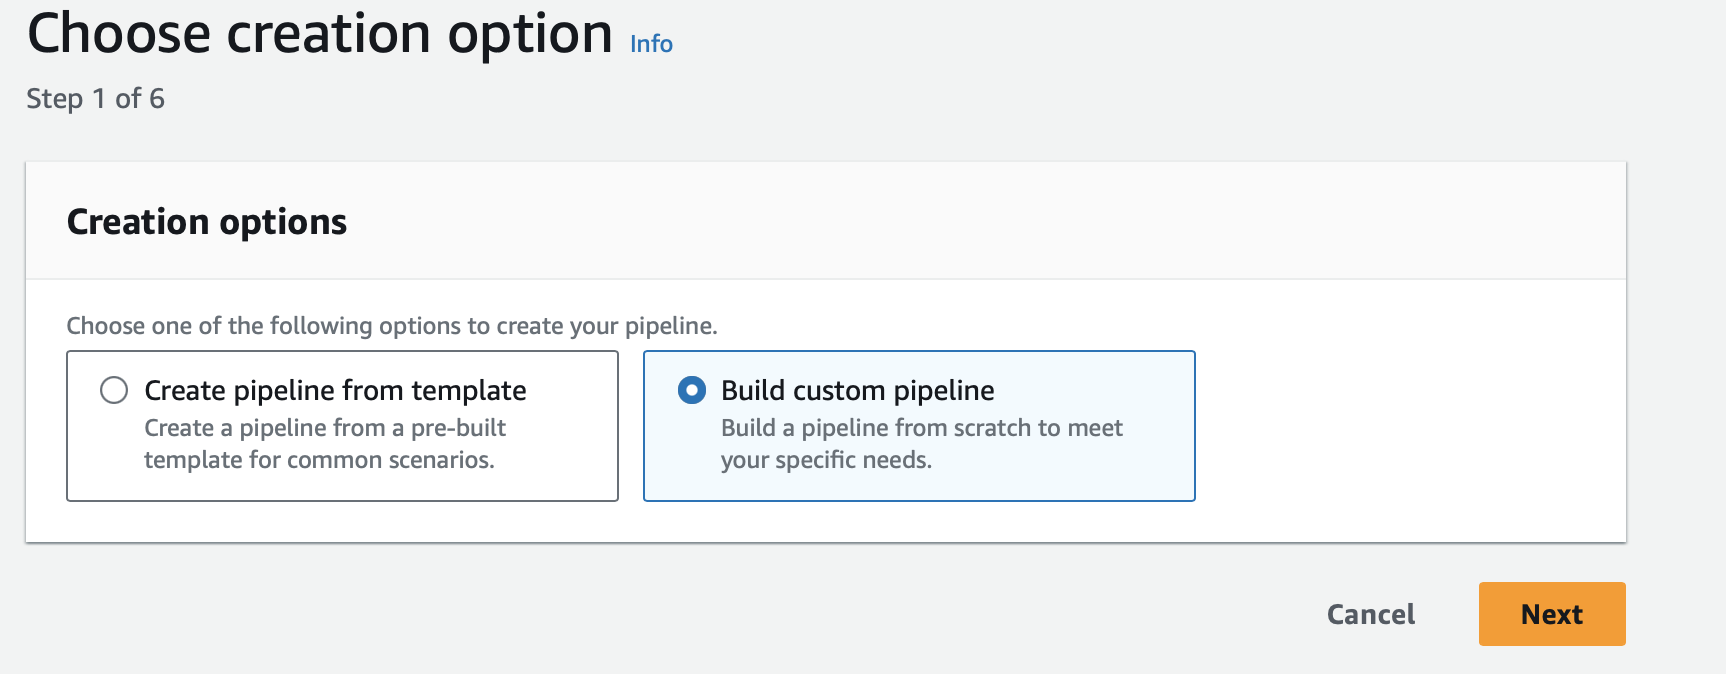
This option allows us to build a custom pipeline to deploy from GitHub to s3.
Click Next.
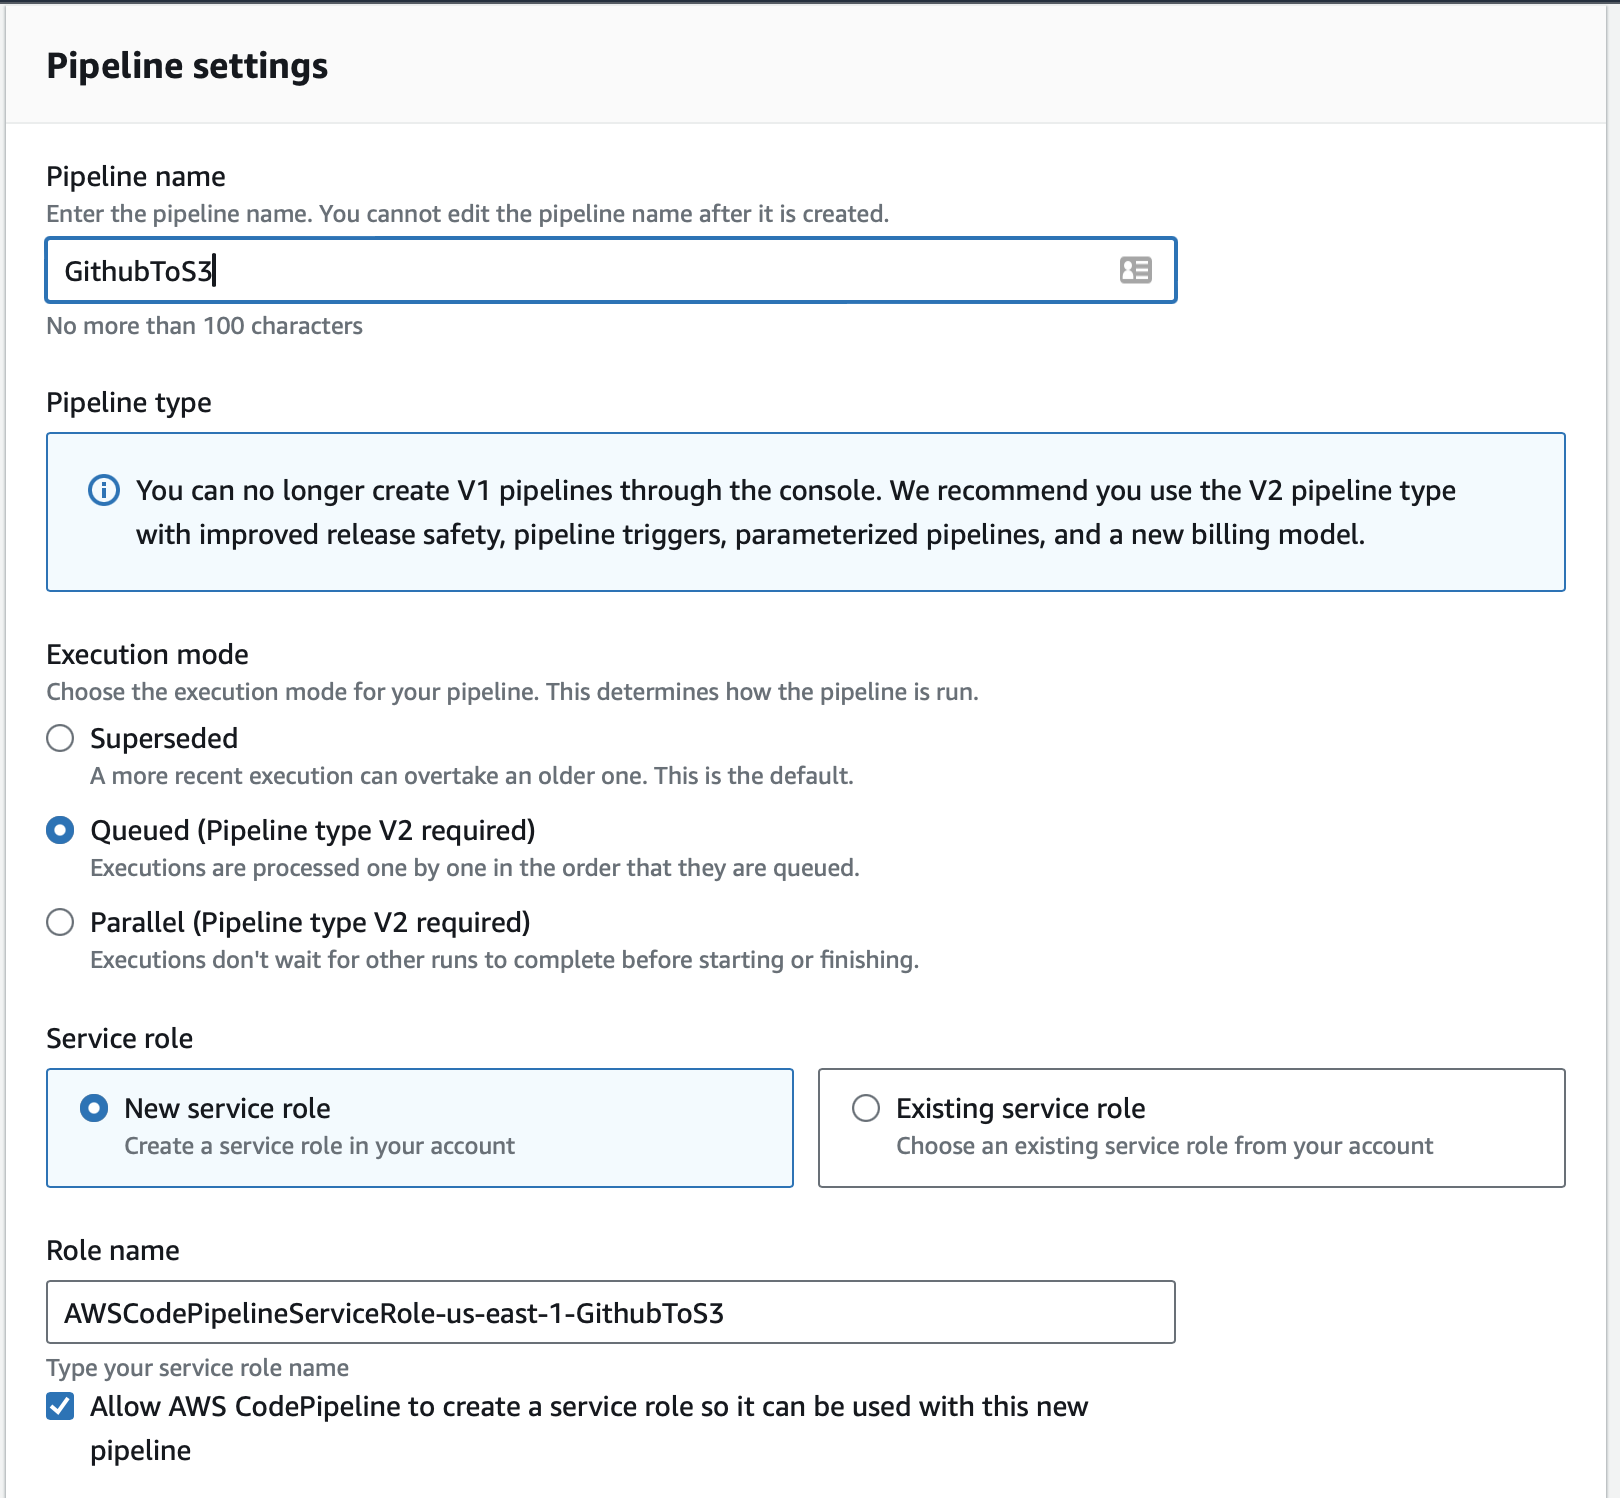
CodePipeline Settings and IAM Service Role
- Name the Pipeline: Choose a meaningful name.
- Service Role: Select New service role to allow AWS to create a role automatically.
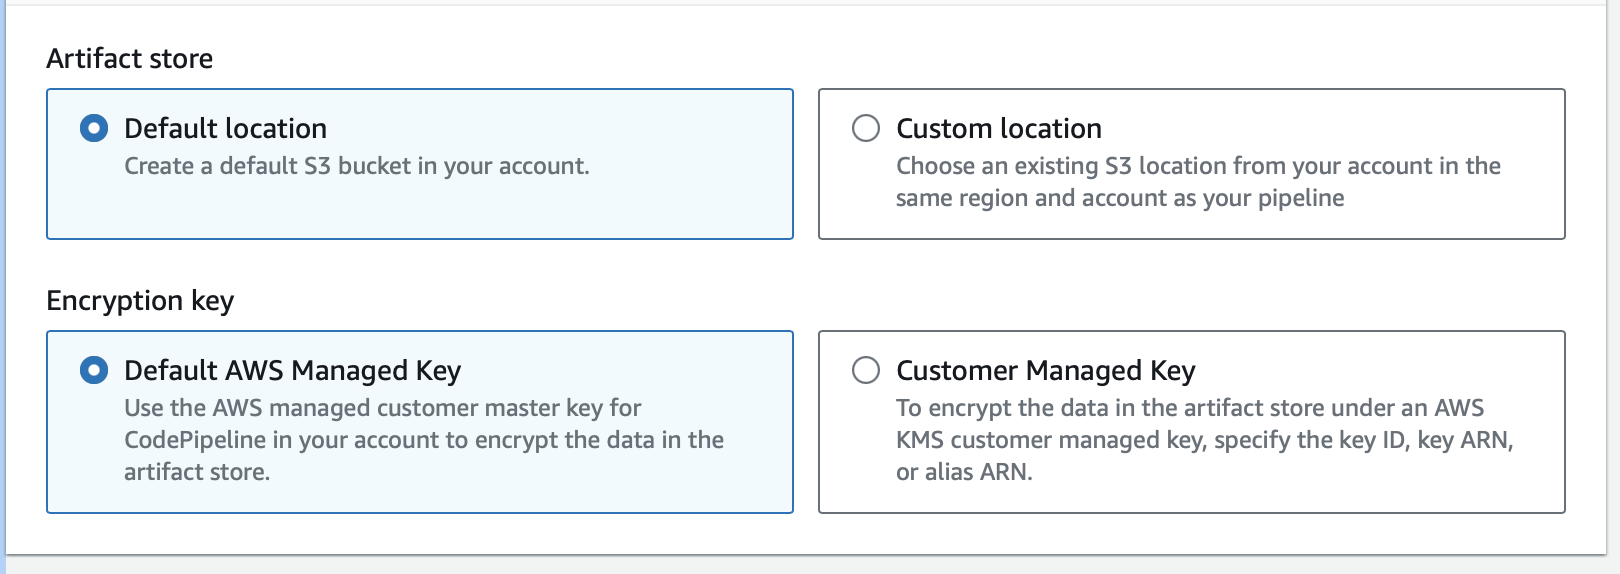
- Advanced settings: Use the default location to allow AWS to create an S3 bucket for CodePipeline artifacts, which will maintain deployment history.
Add GitHub as the Source Stage
Click Connect to GitHub.
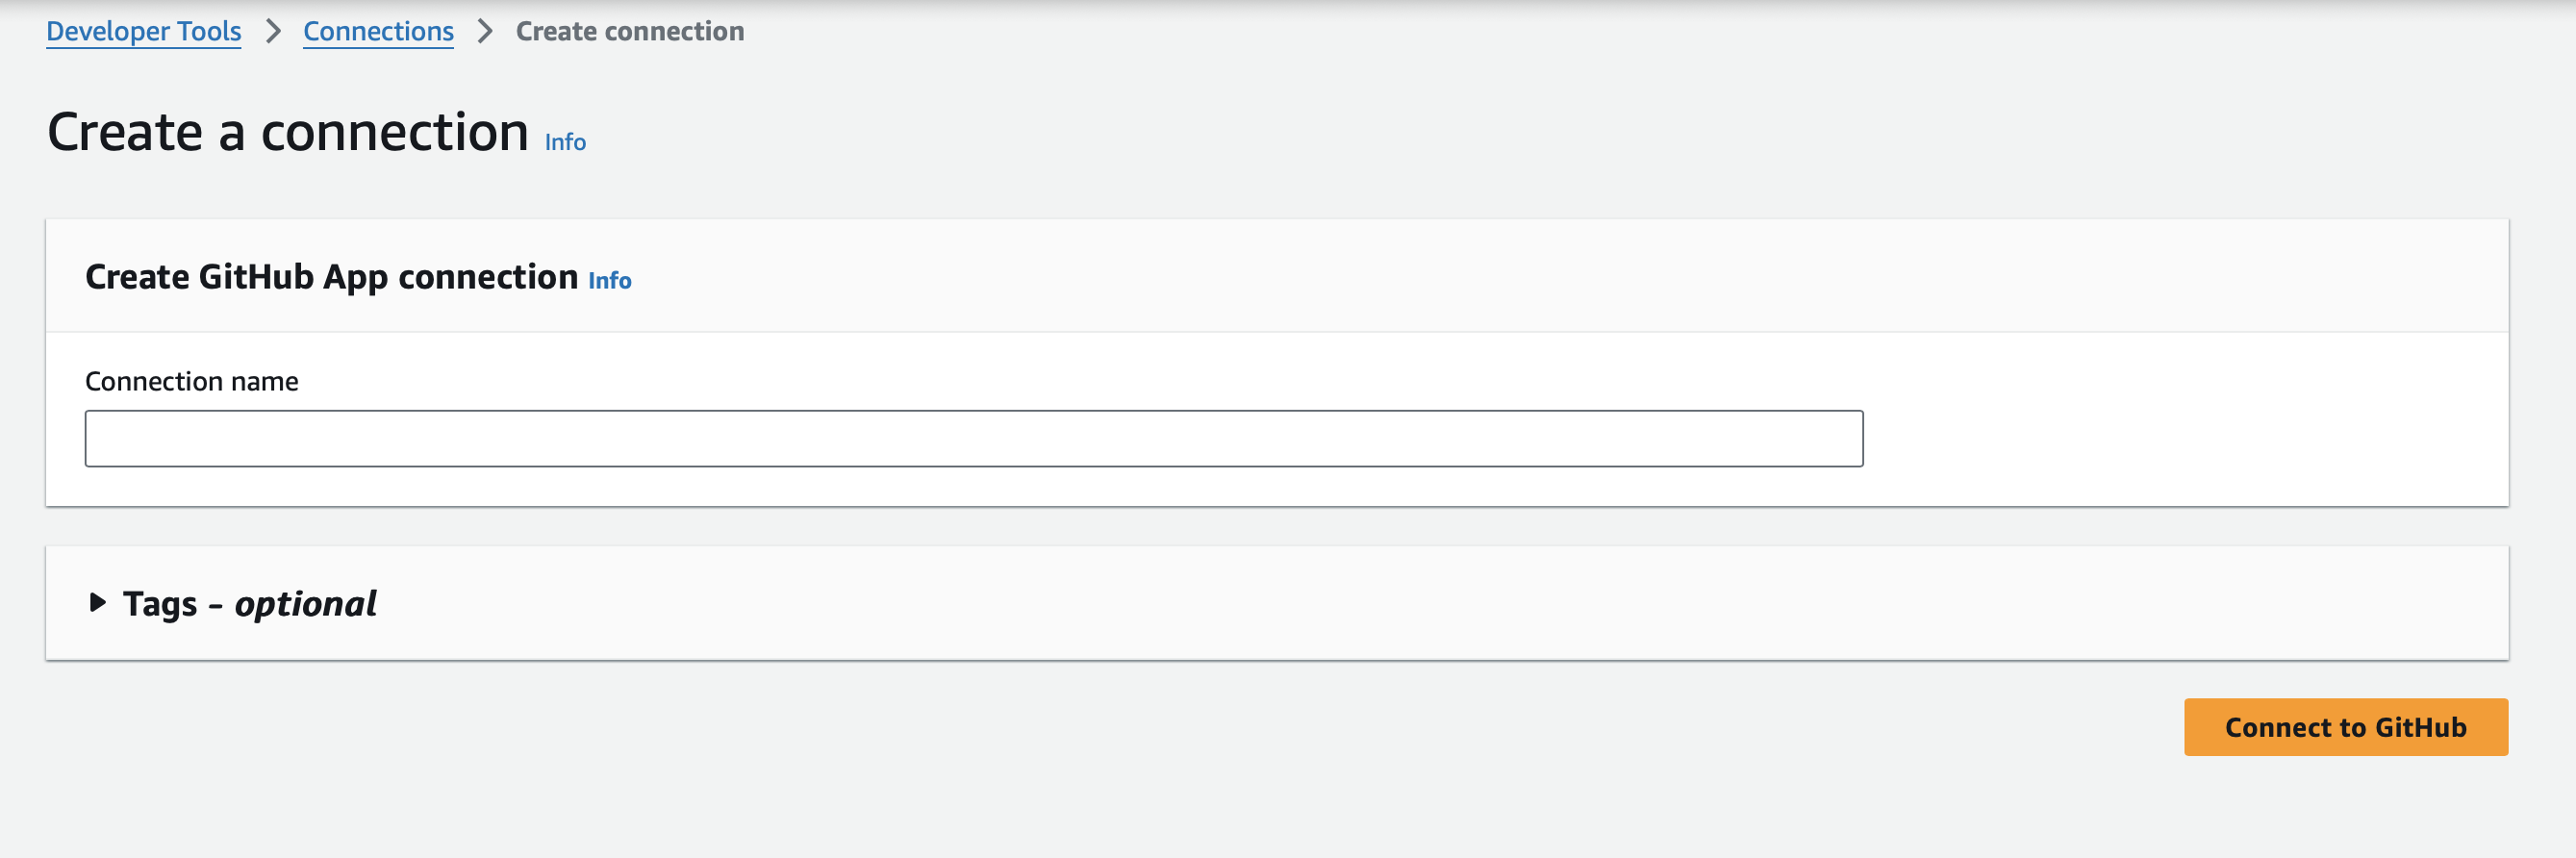
Name your connection and click Connect to Github.
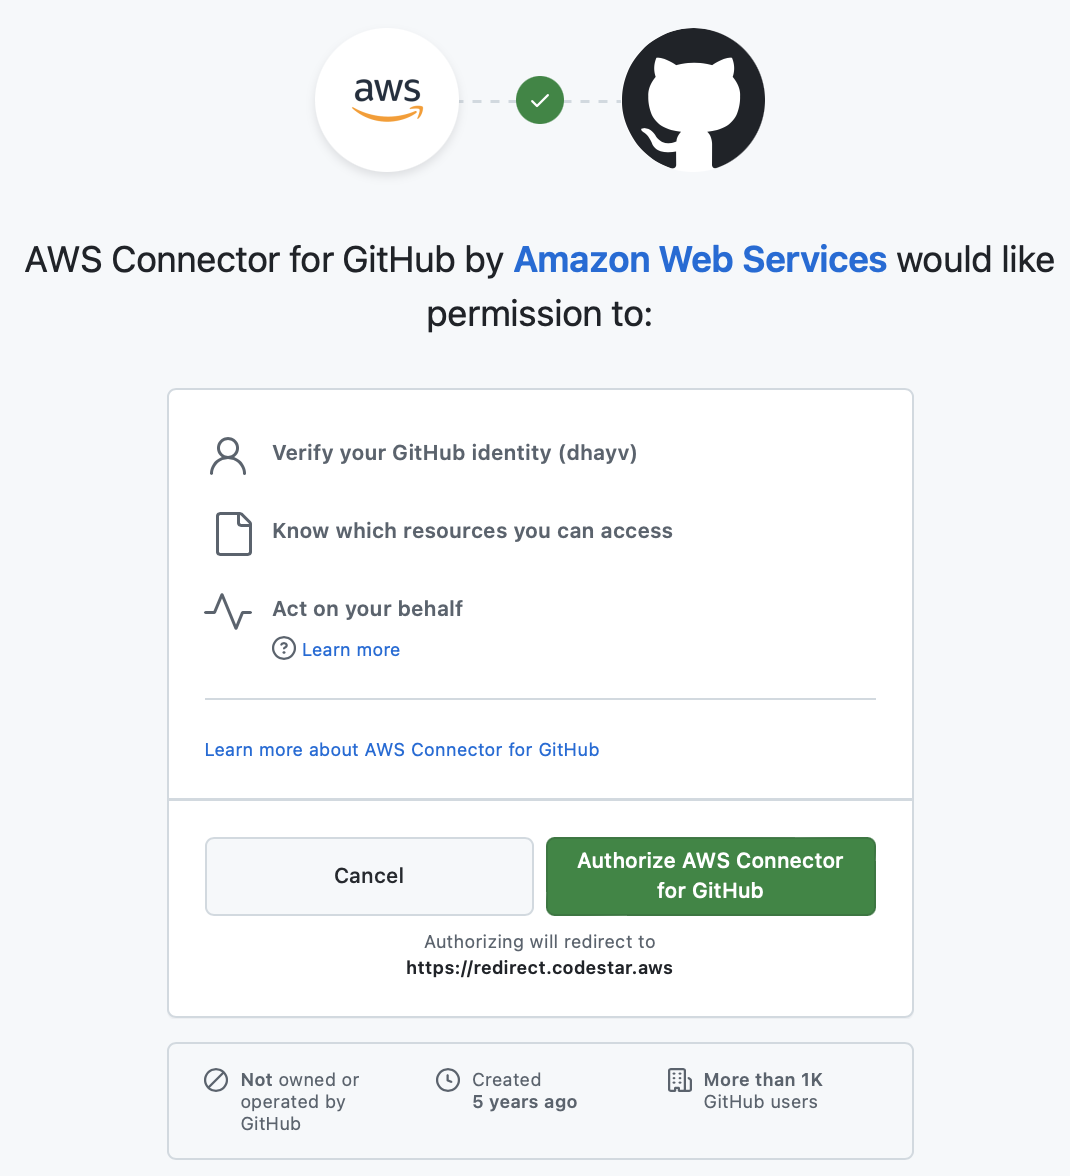
Click Authorize AWS Connector for Github to grant AWS access to your GitHub repository.
- A basic GitHub user connection suffices for this static website deployment pipeline.
- If working with multiple organizations, select the specific user or organization repositories you want to use.
- Click Connect.
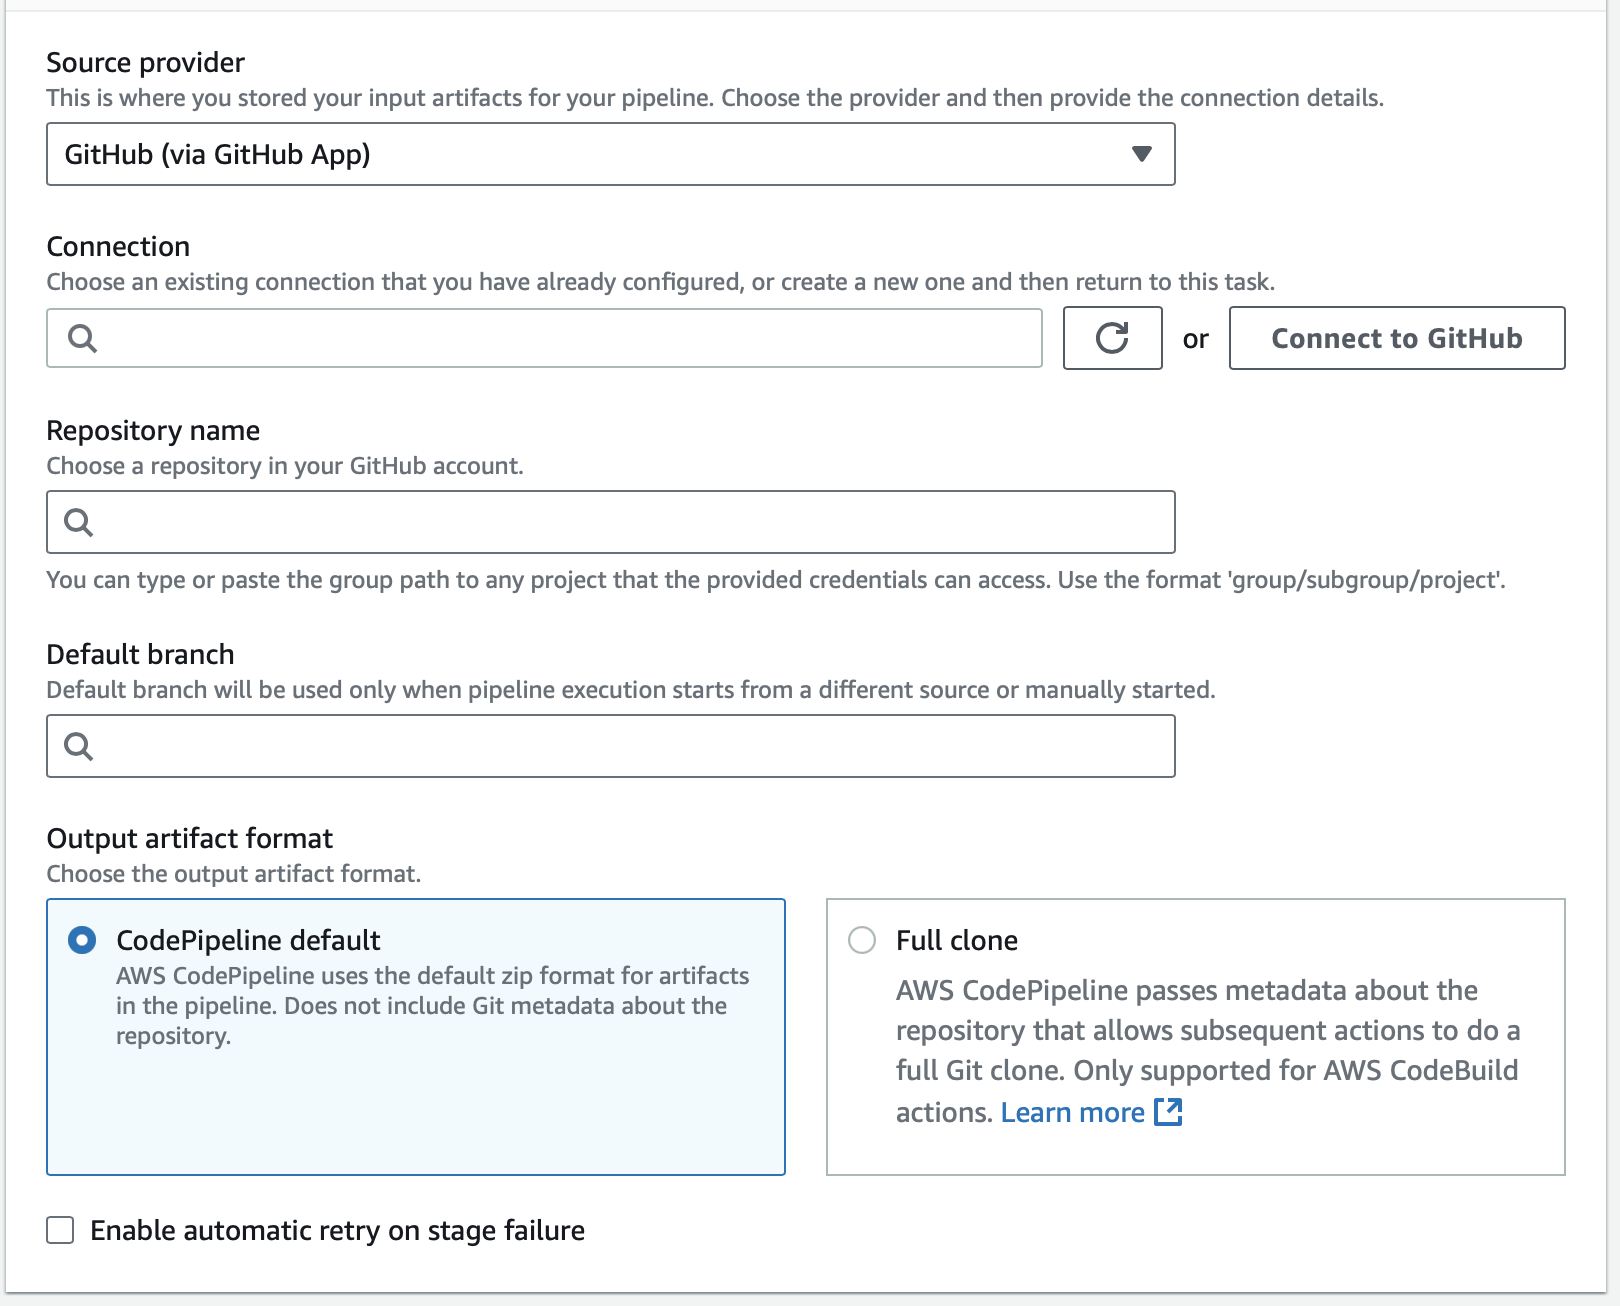
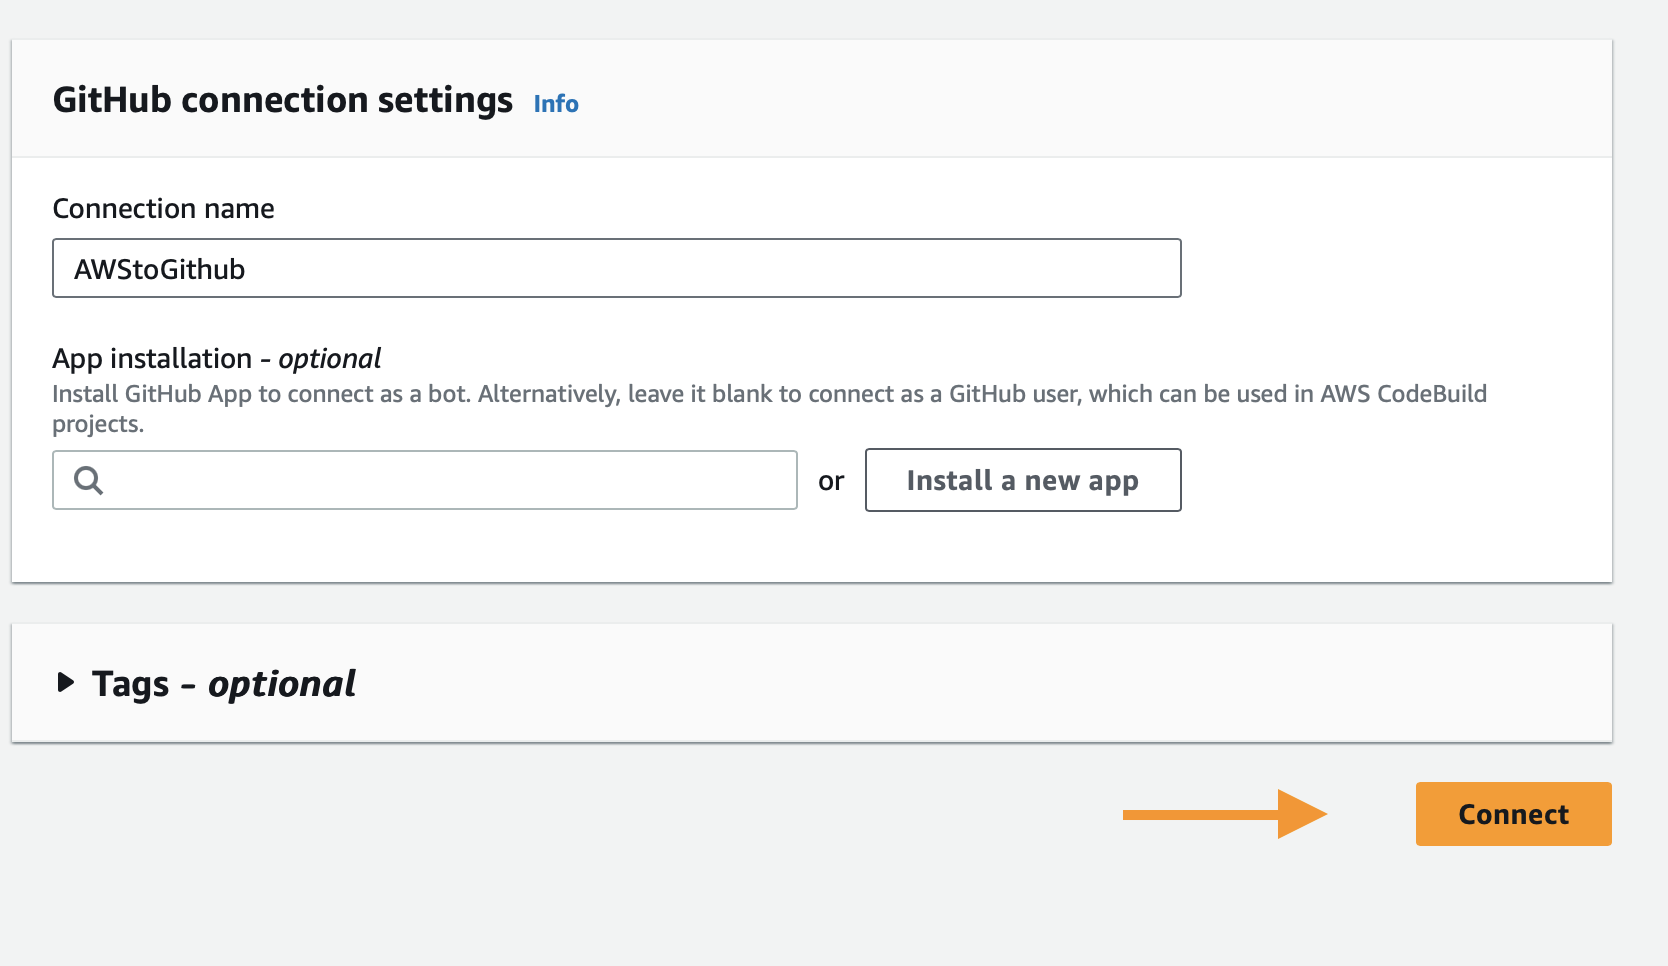
Configure GitHub Source Stage Settings
- Source Provider: GitHub (via GitHub App)
- Connection: Your GitHub connection
- Repository Name: Select your repository
- Default Branch: main
- Output Artifact Format: Default settings
- Webhook Events: Trigger the pipeline on push and pull request events.
- Click Next.
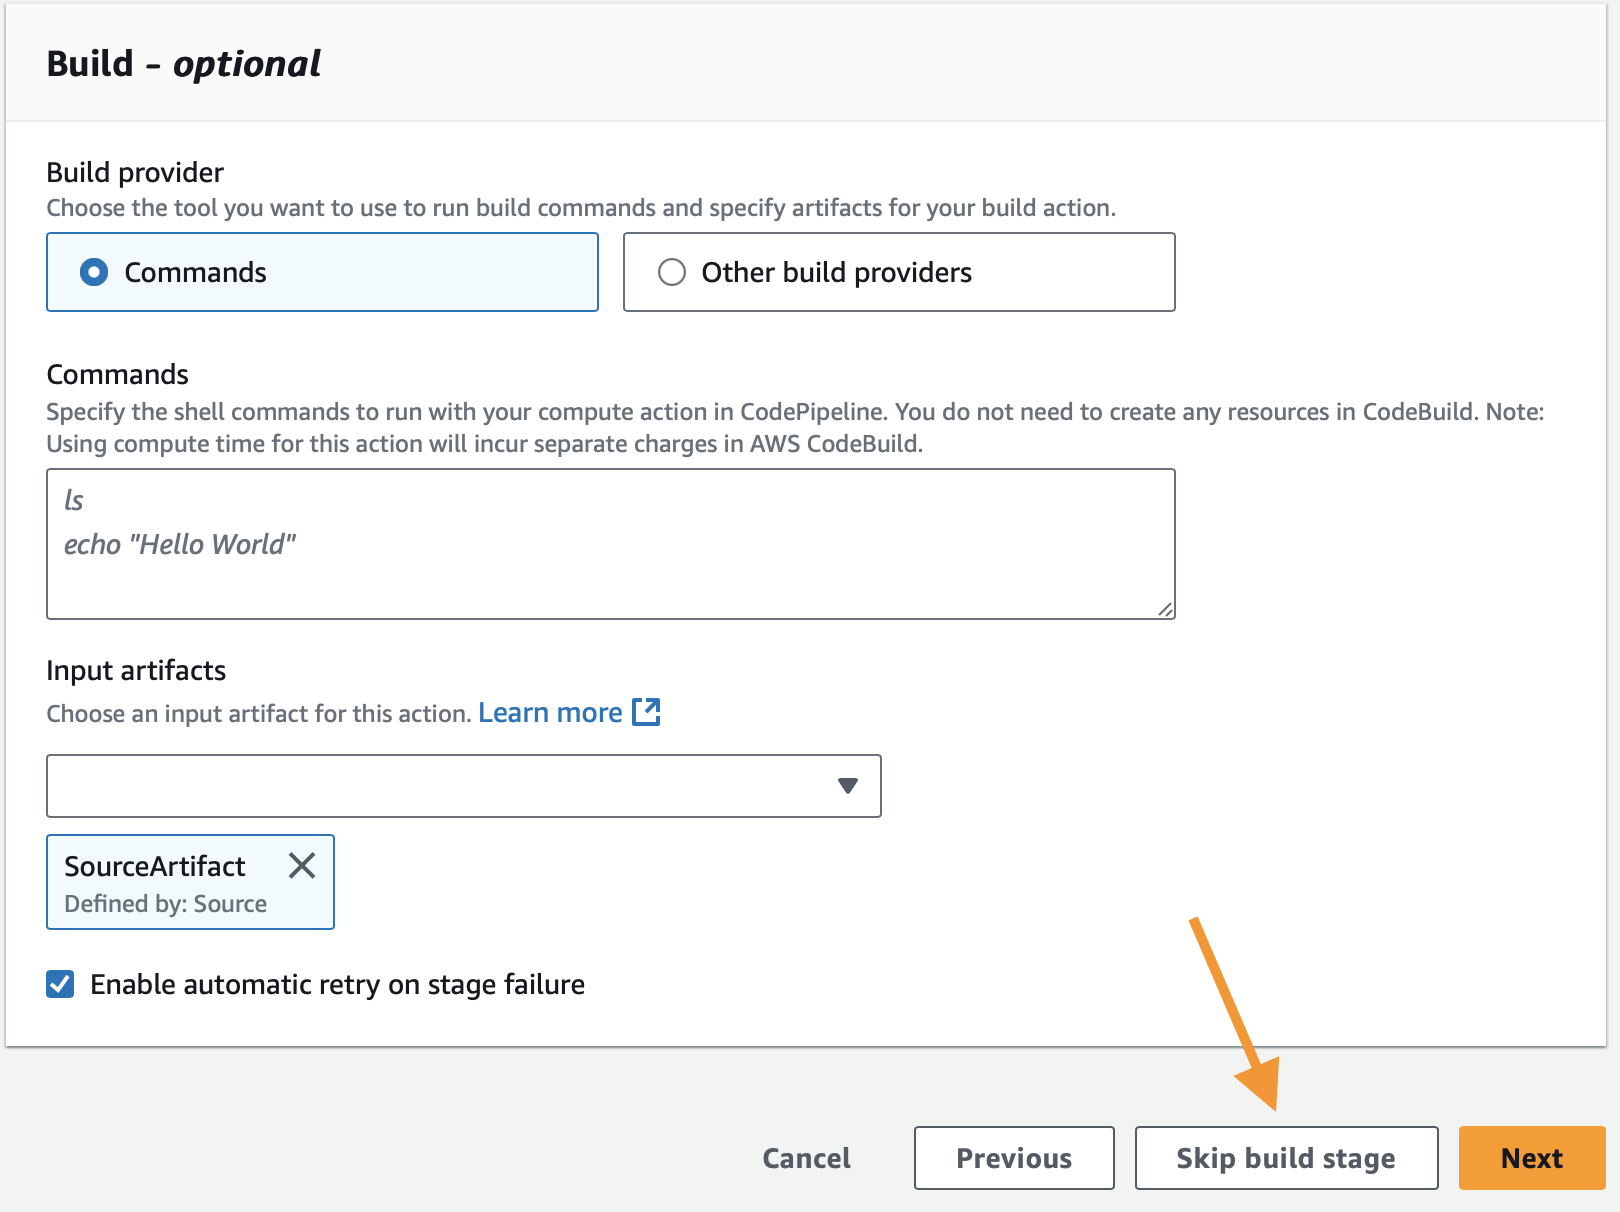
Skip Build and Test Stages for Static Sites
- Since you’re deploying HTML files, you can skip the build stage.
- Optionally, skip the test stage.
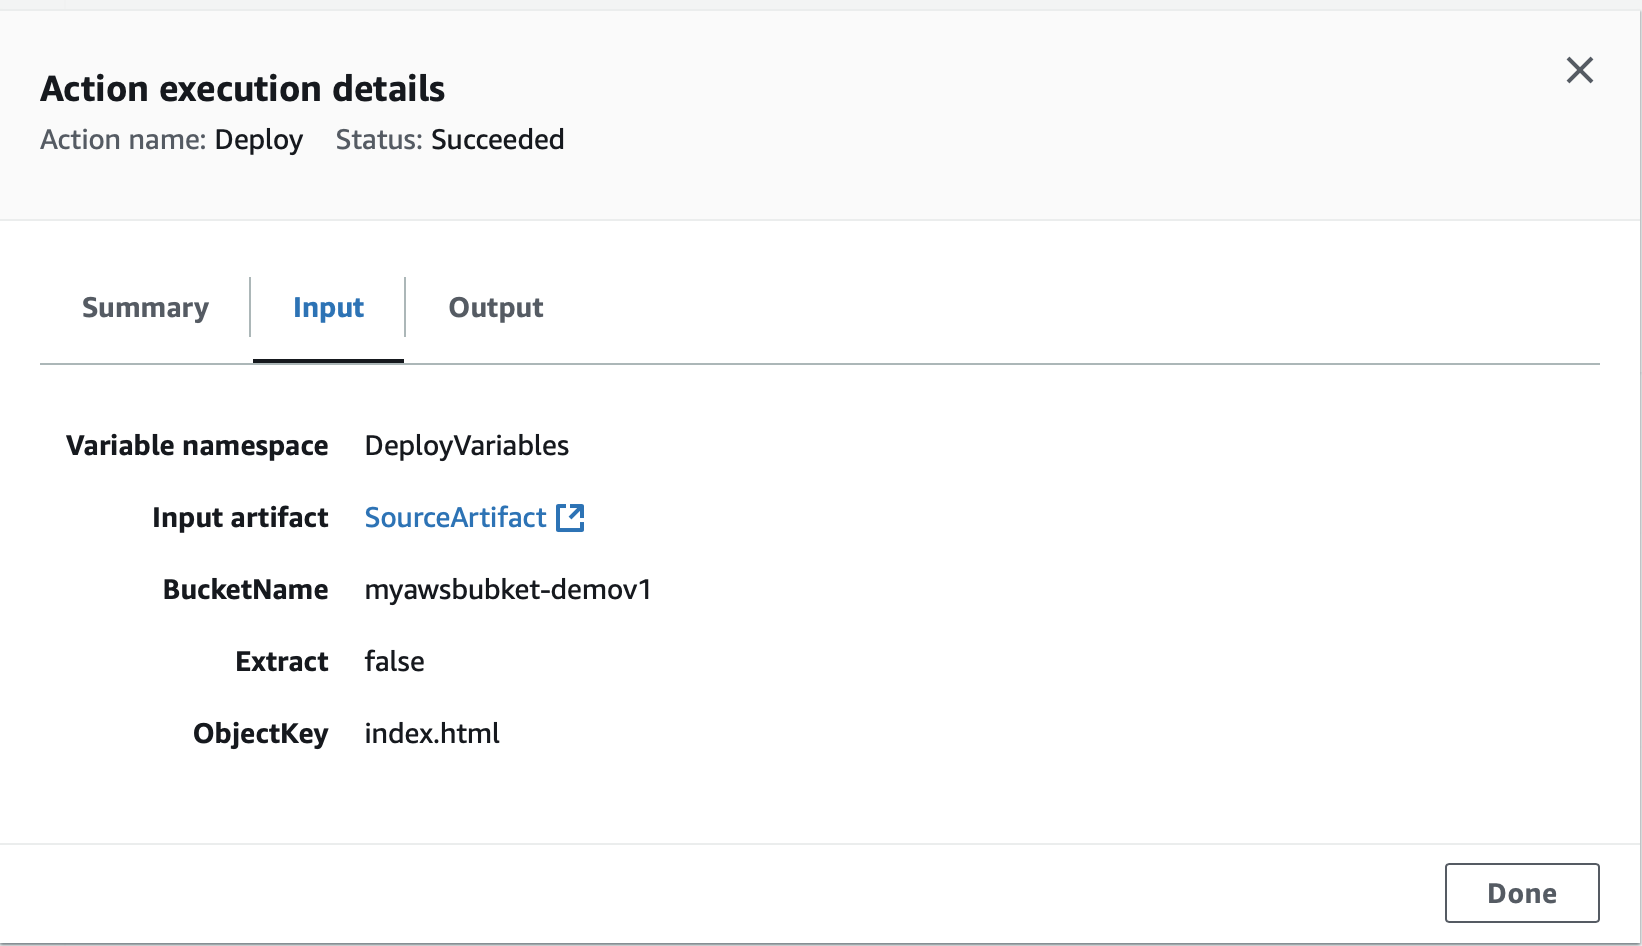
Configure S3 as the Deploy Stage

- Deploy Provider: Amazon S3
- Region: Your chosen AWS region
- Bucket: Select your static hosted S3 bucket
- S3 Object Key: Leave blank
- Extract file before deploy: Checked
- Click Next.
Review and Create the CodePipeline
- Review all settings and click Create Pipeline.
Step 4: Test the Automated S3 Deployment Pipeline
Pipeline automatically starts
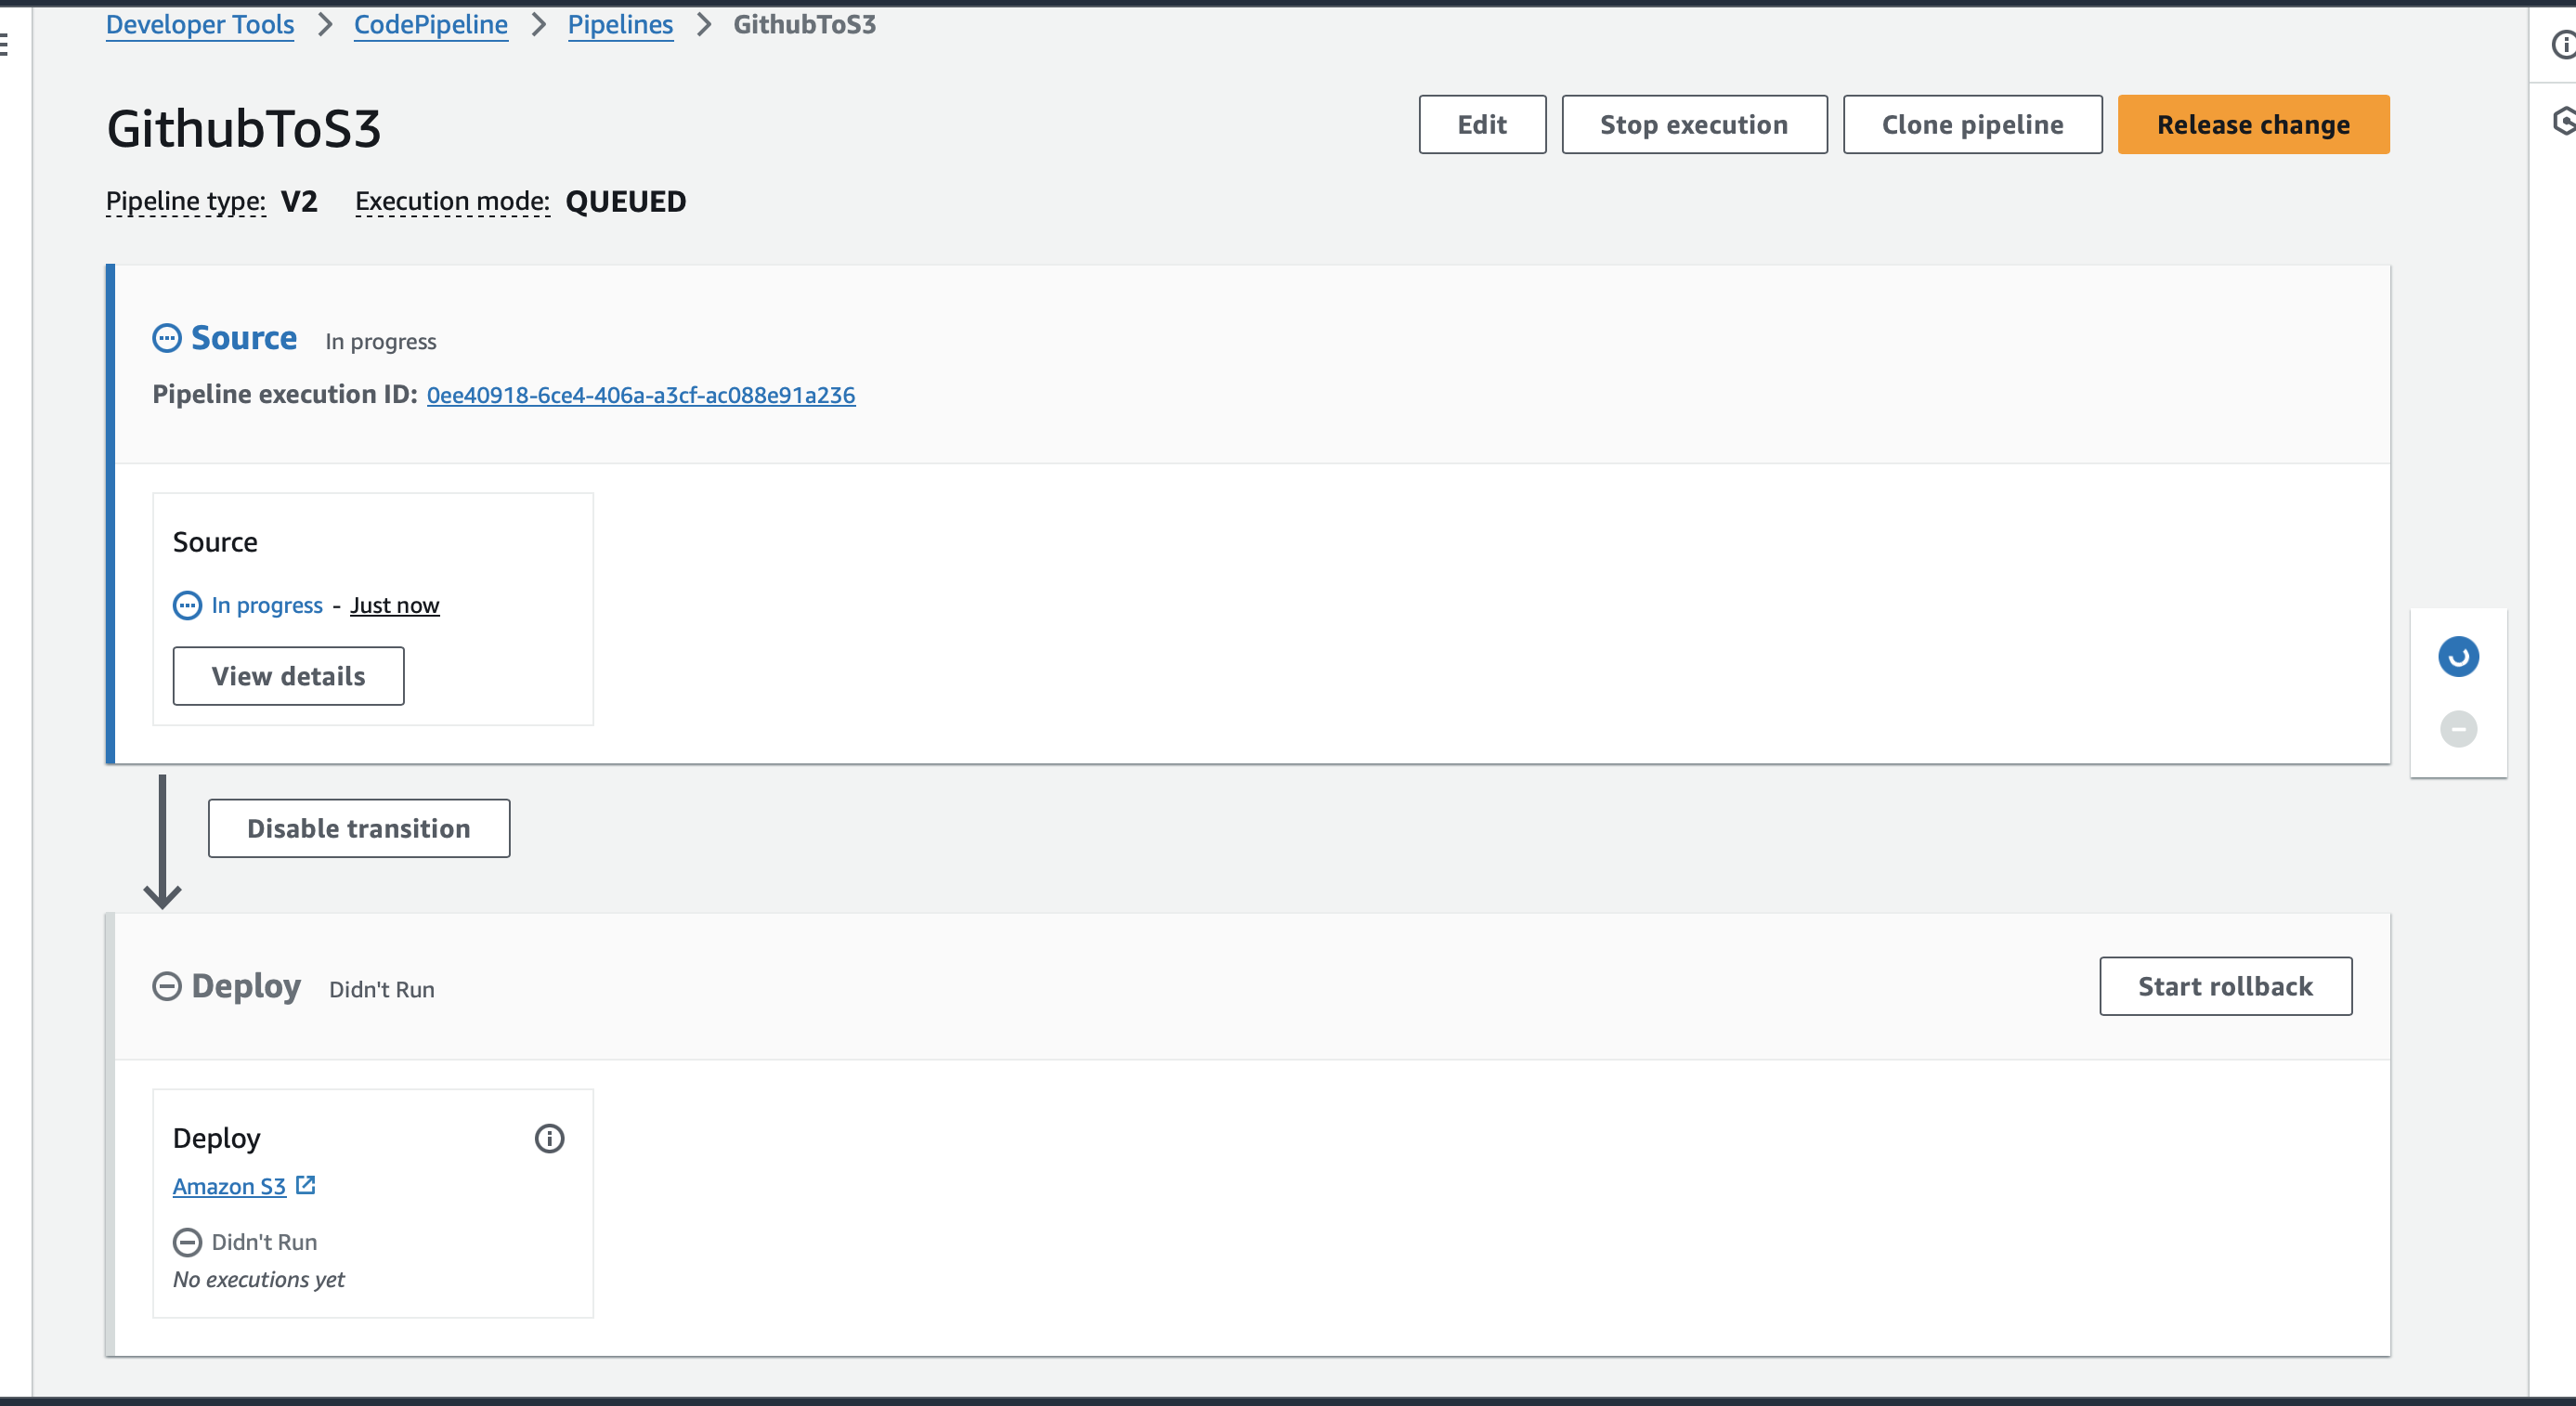
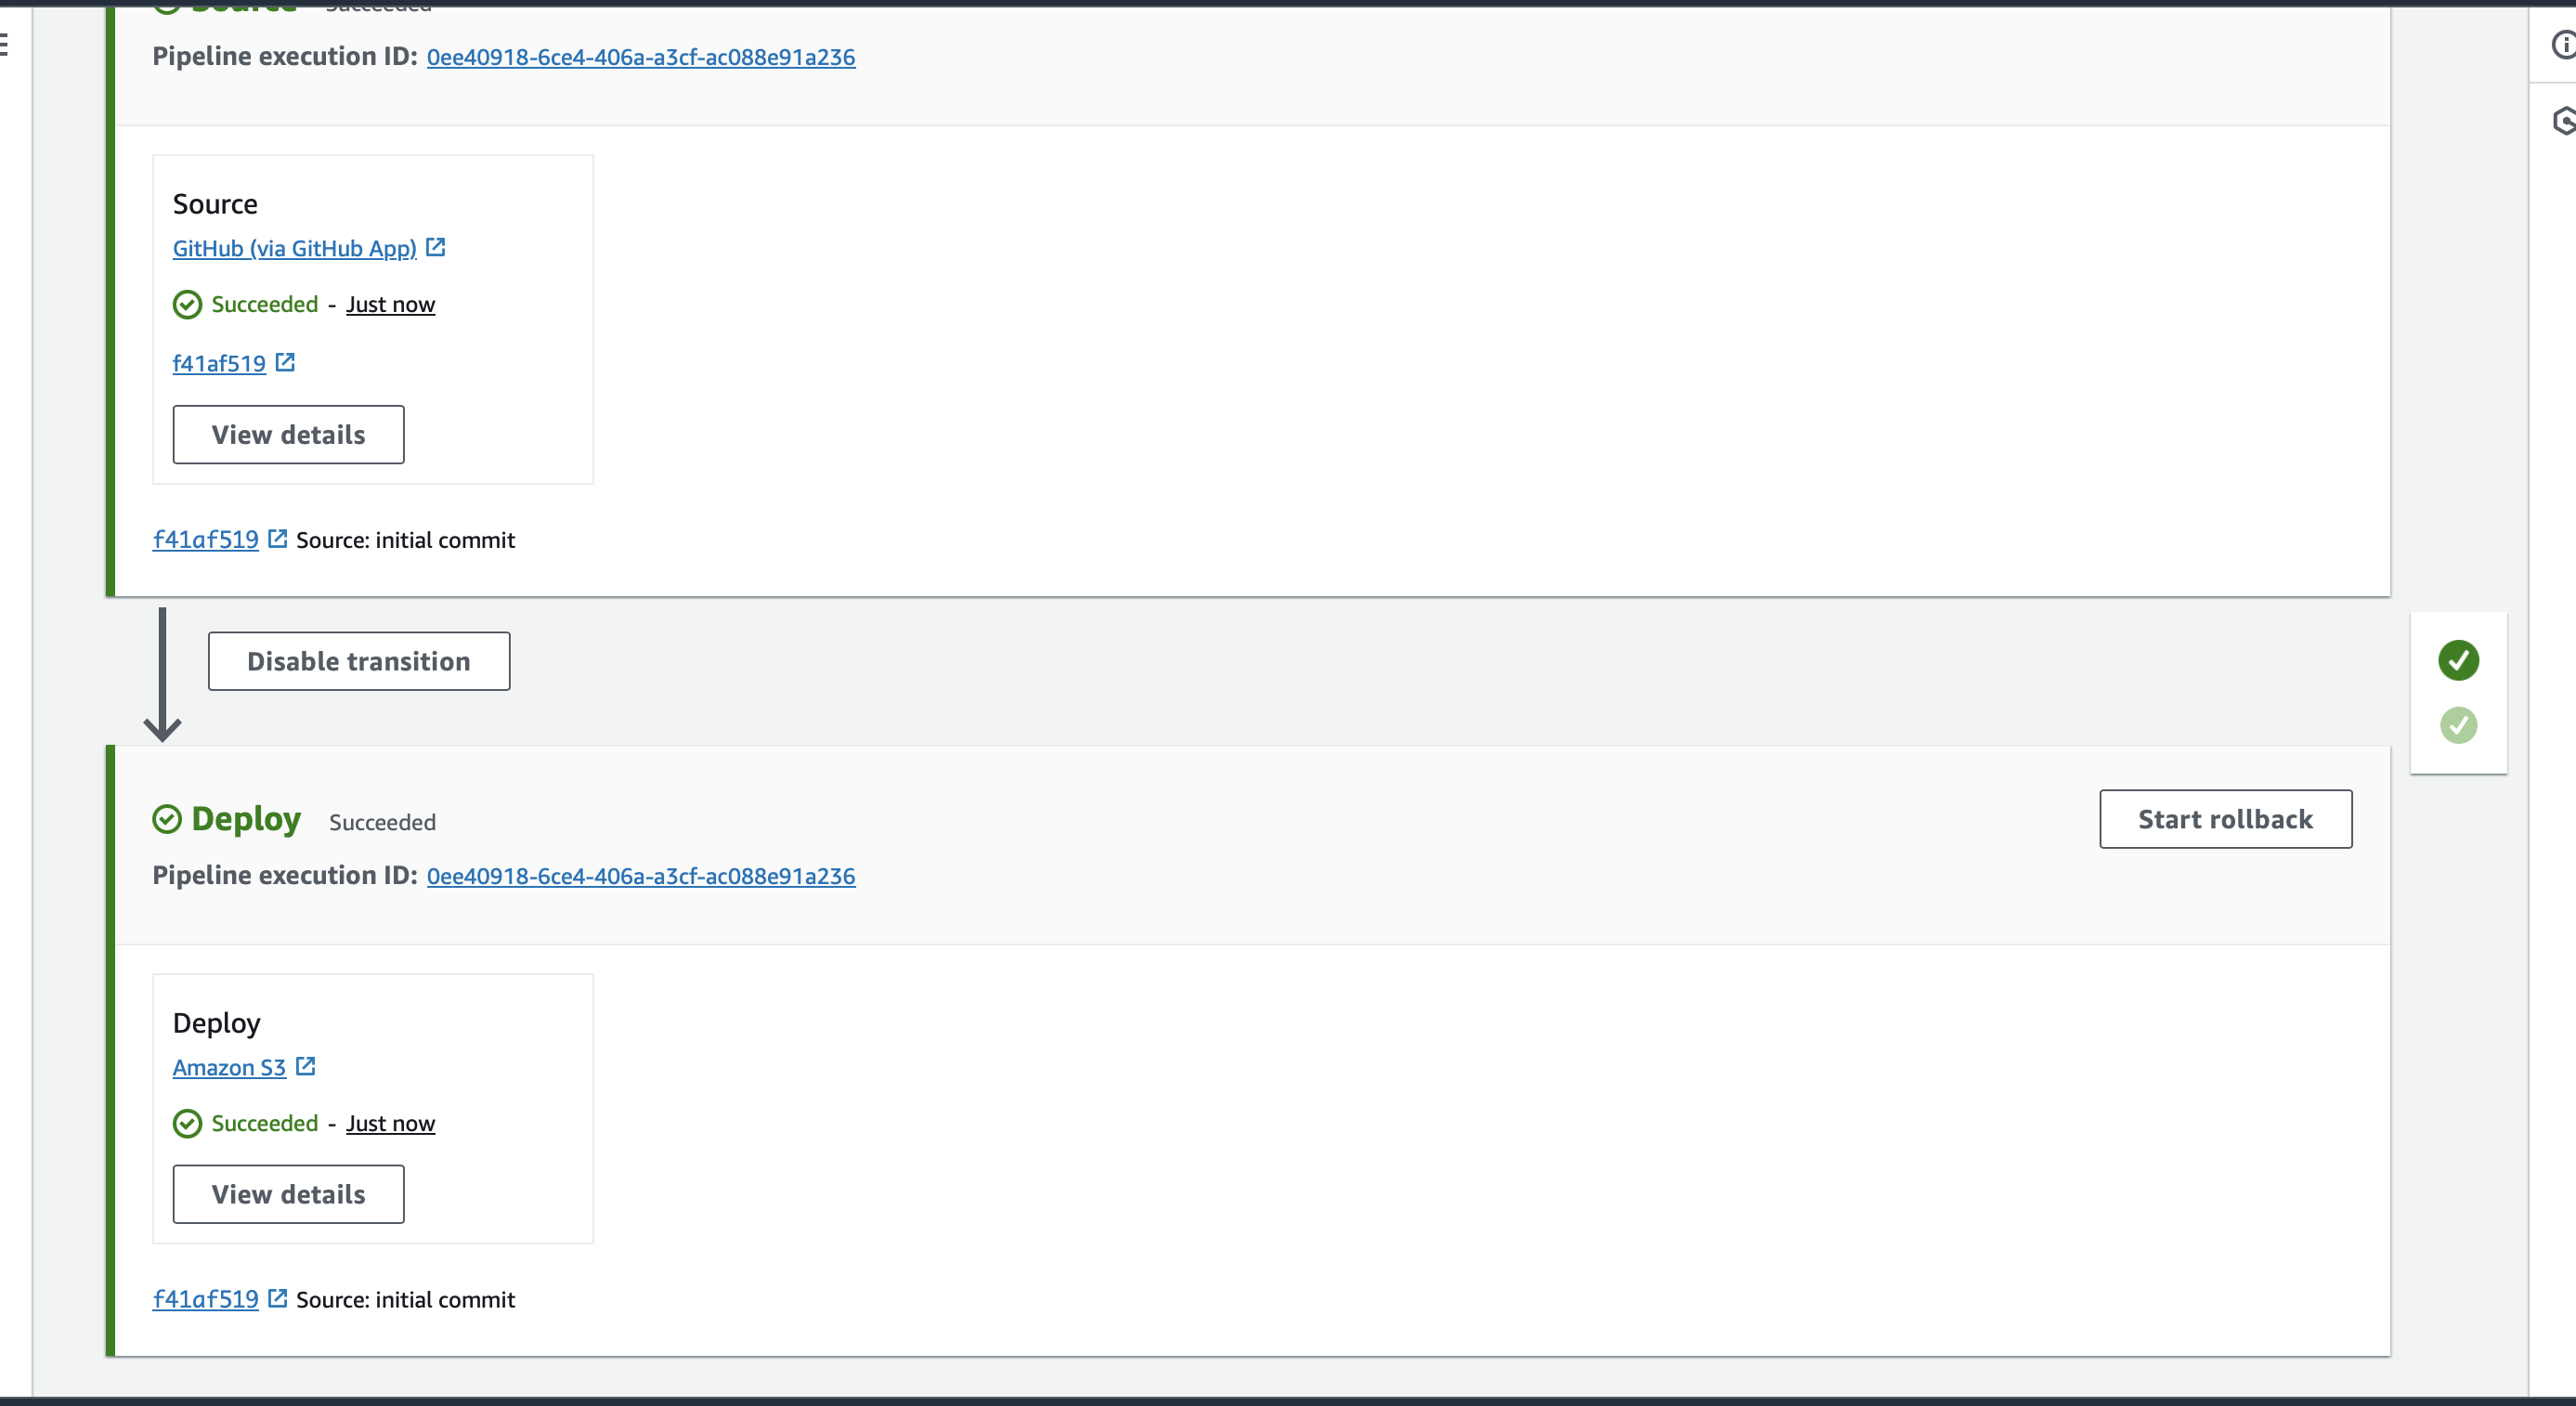
The pipeline creation process should complete quickly.

As you can see, we’ve created a zero-touch solution from GitHub to S3, where files are automatically pulled from the repository without manual uploads.
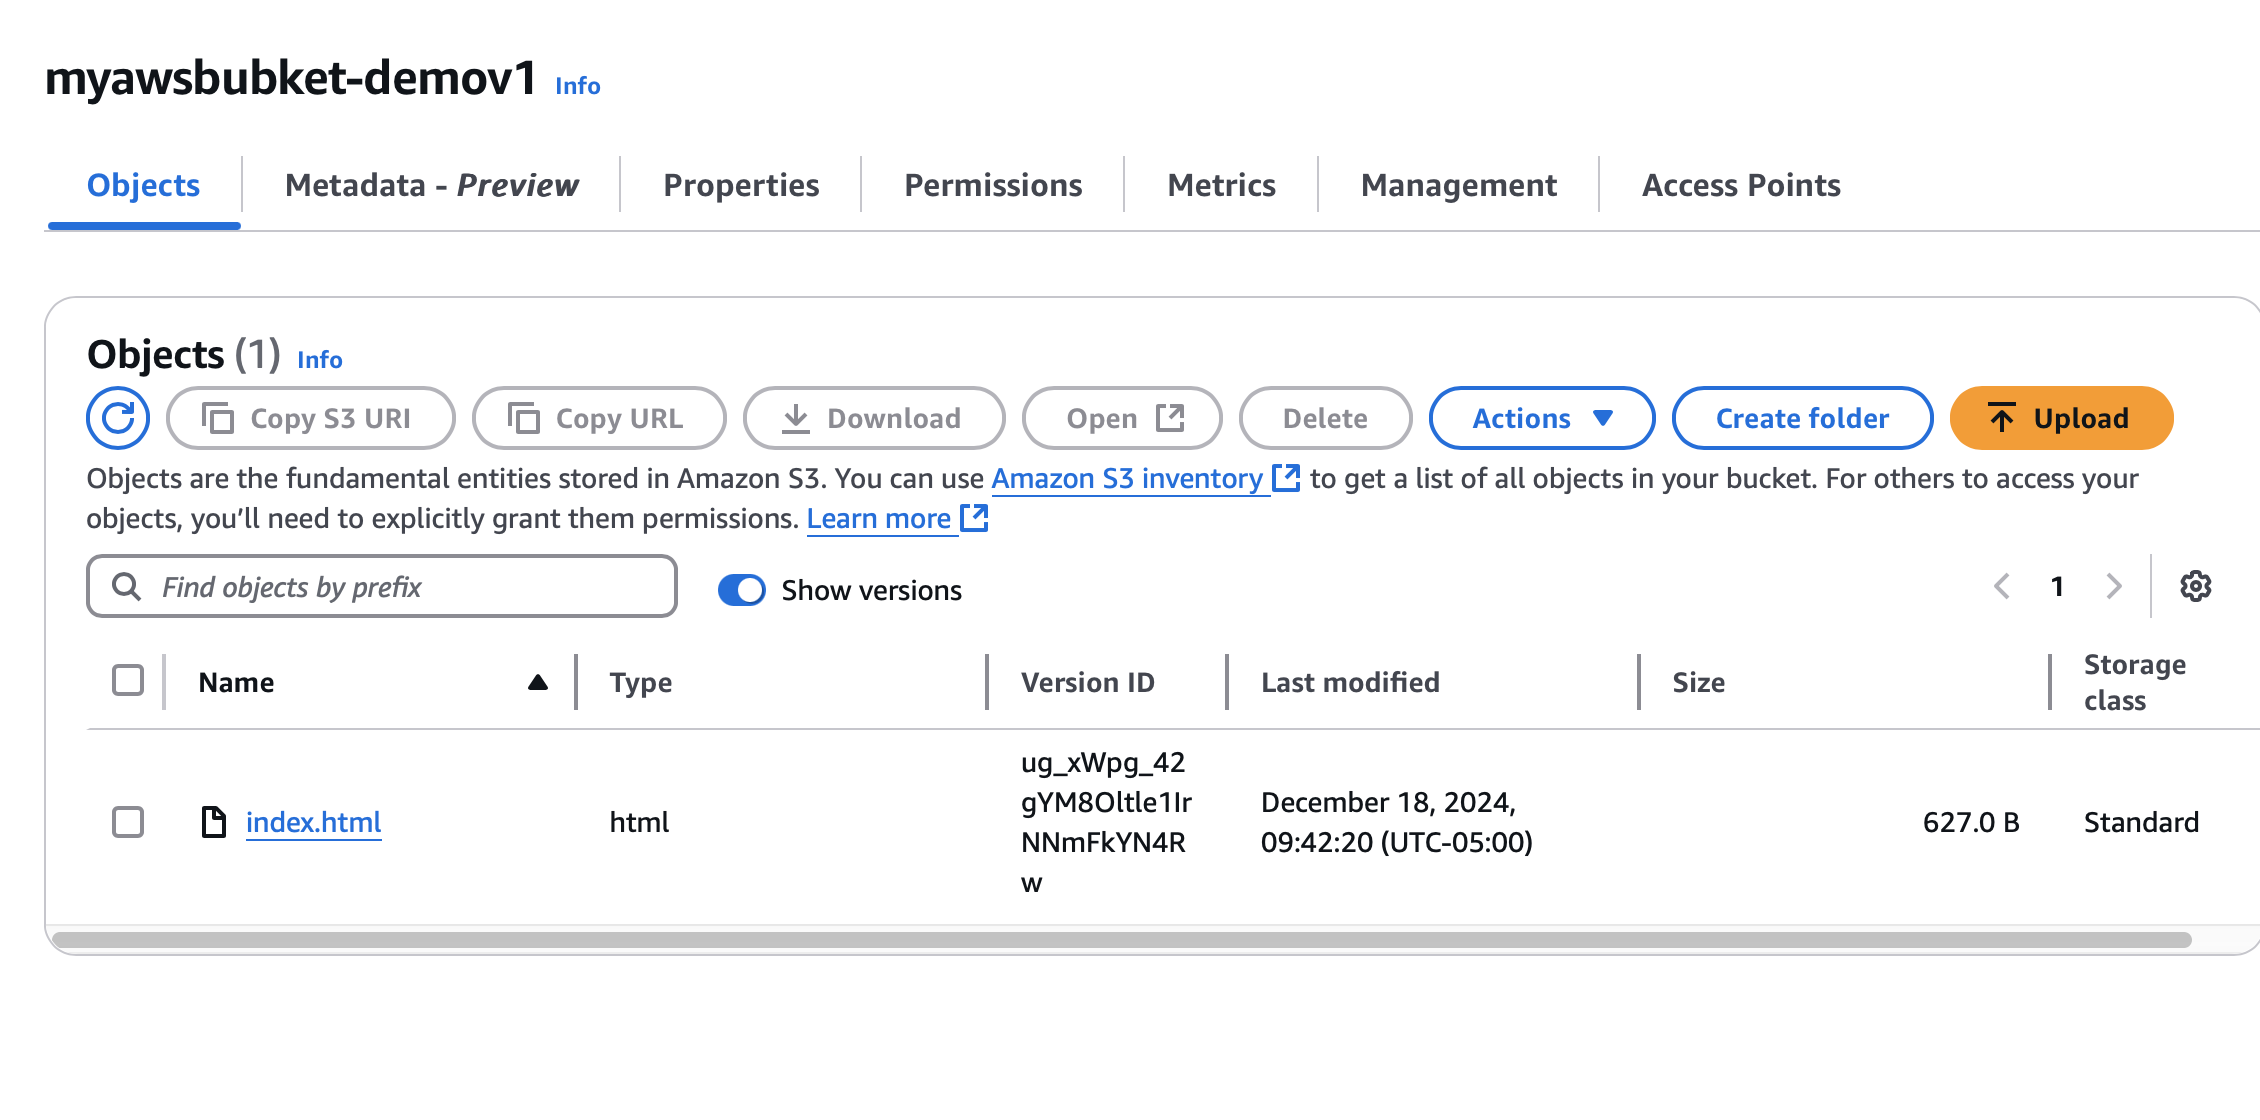
With versioning enabled, you can track deployments:
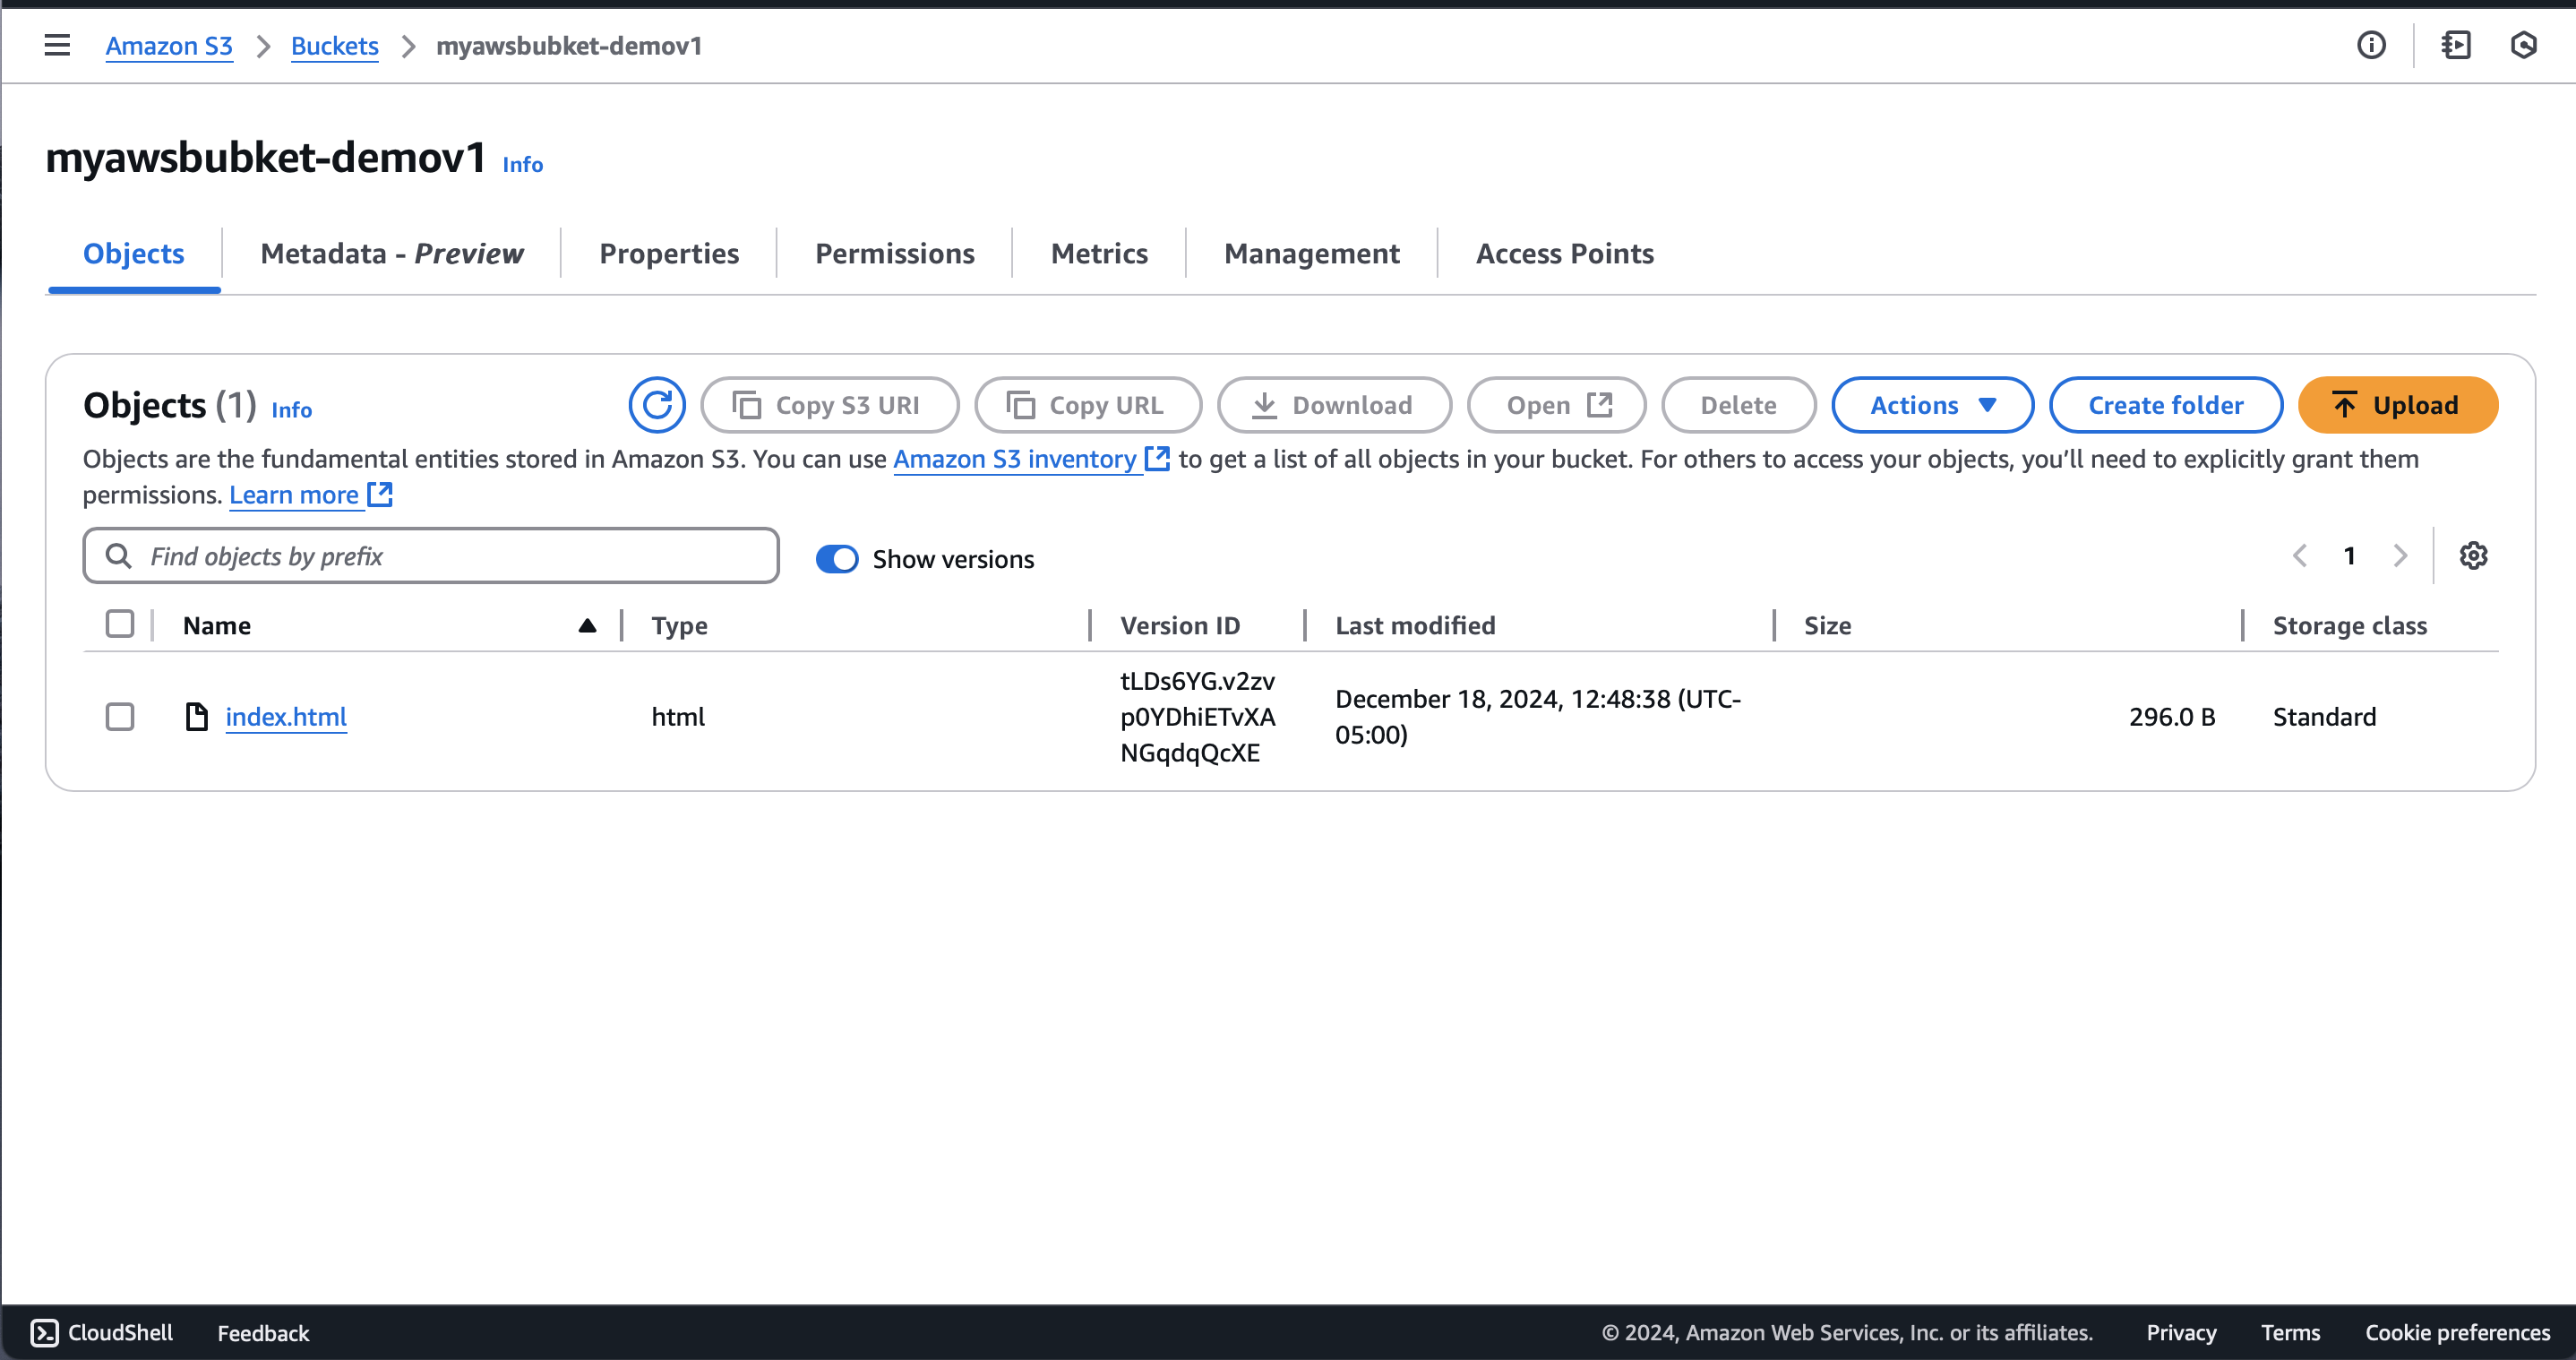
Verify Auto-Deploy: Push Changes From GitHub to S3
Make a change in your repository with a commit message like “Update index.html” to update the deployment version to 2.
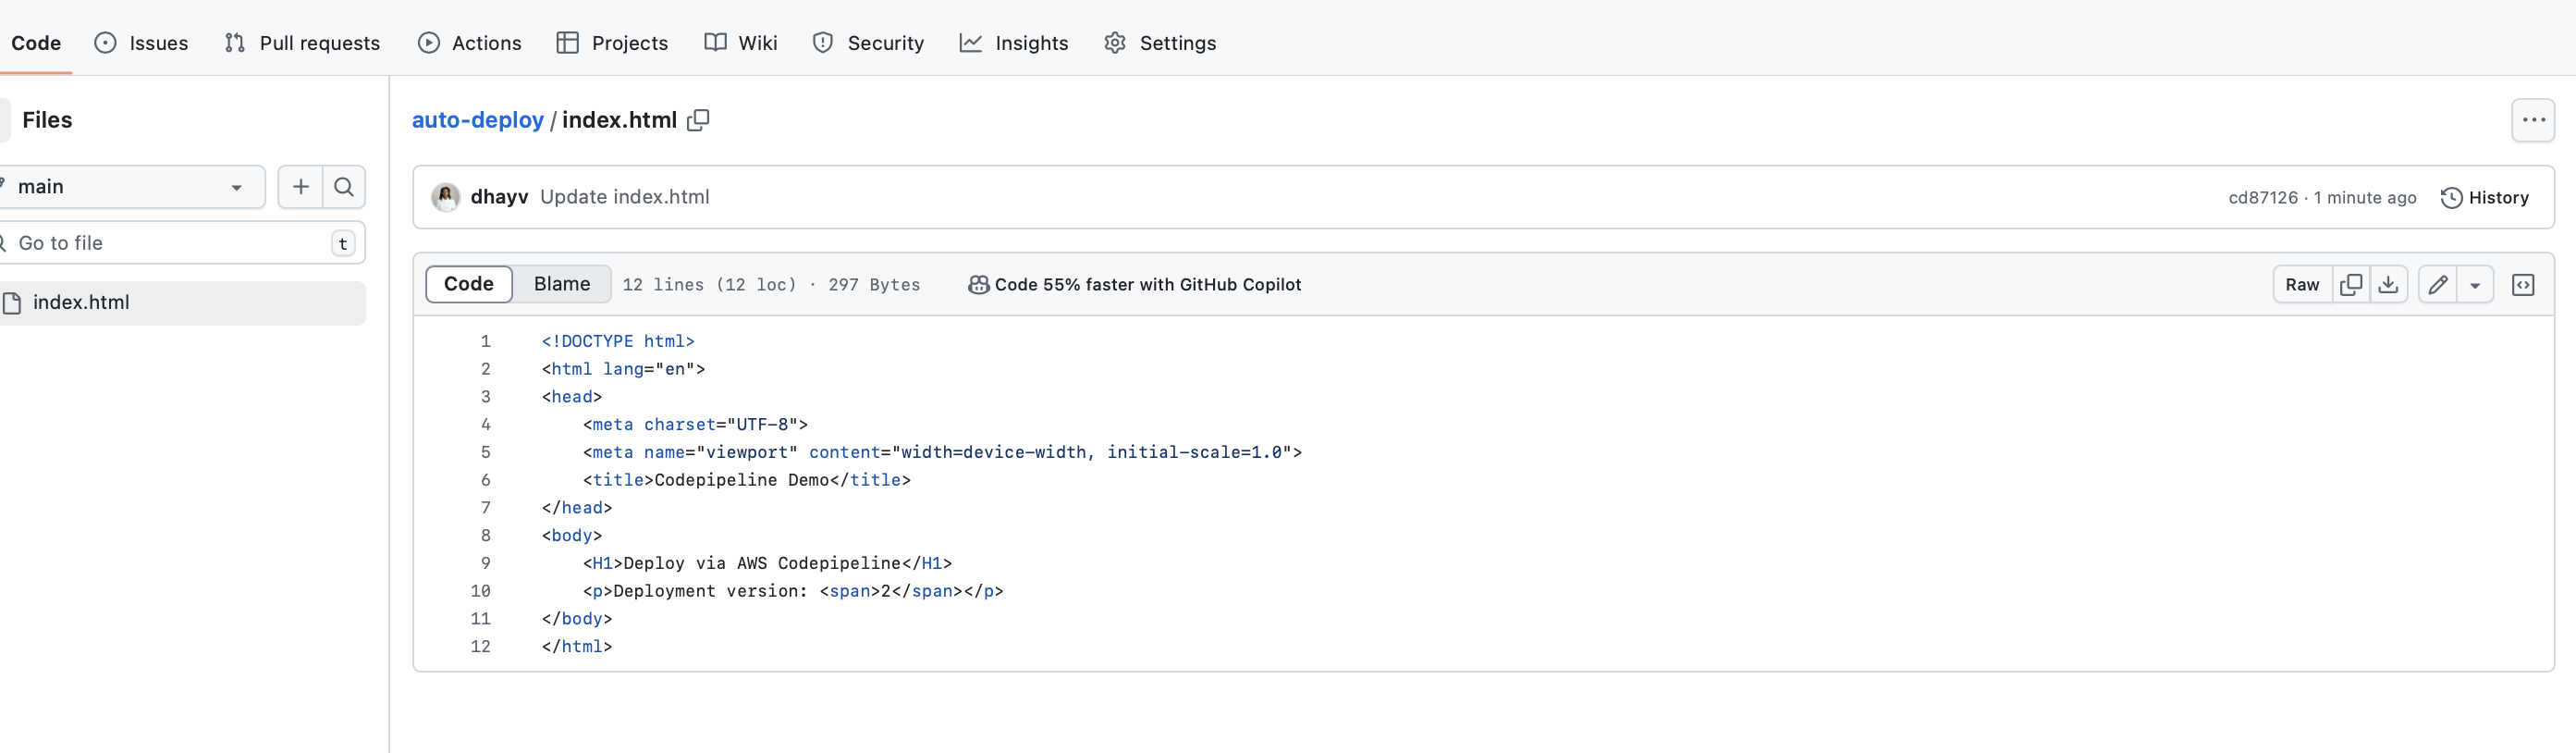
CodePipeline will automatically detect the changes:
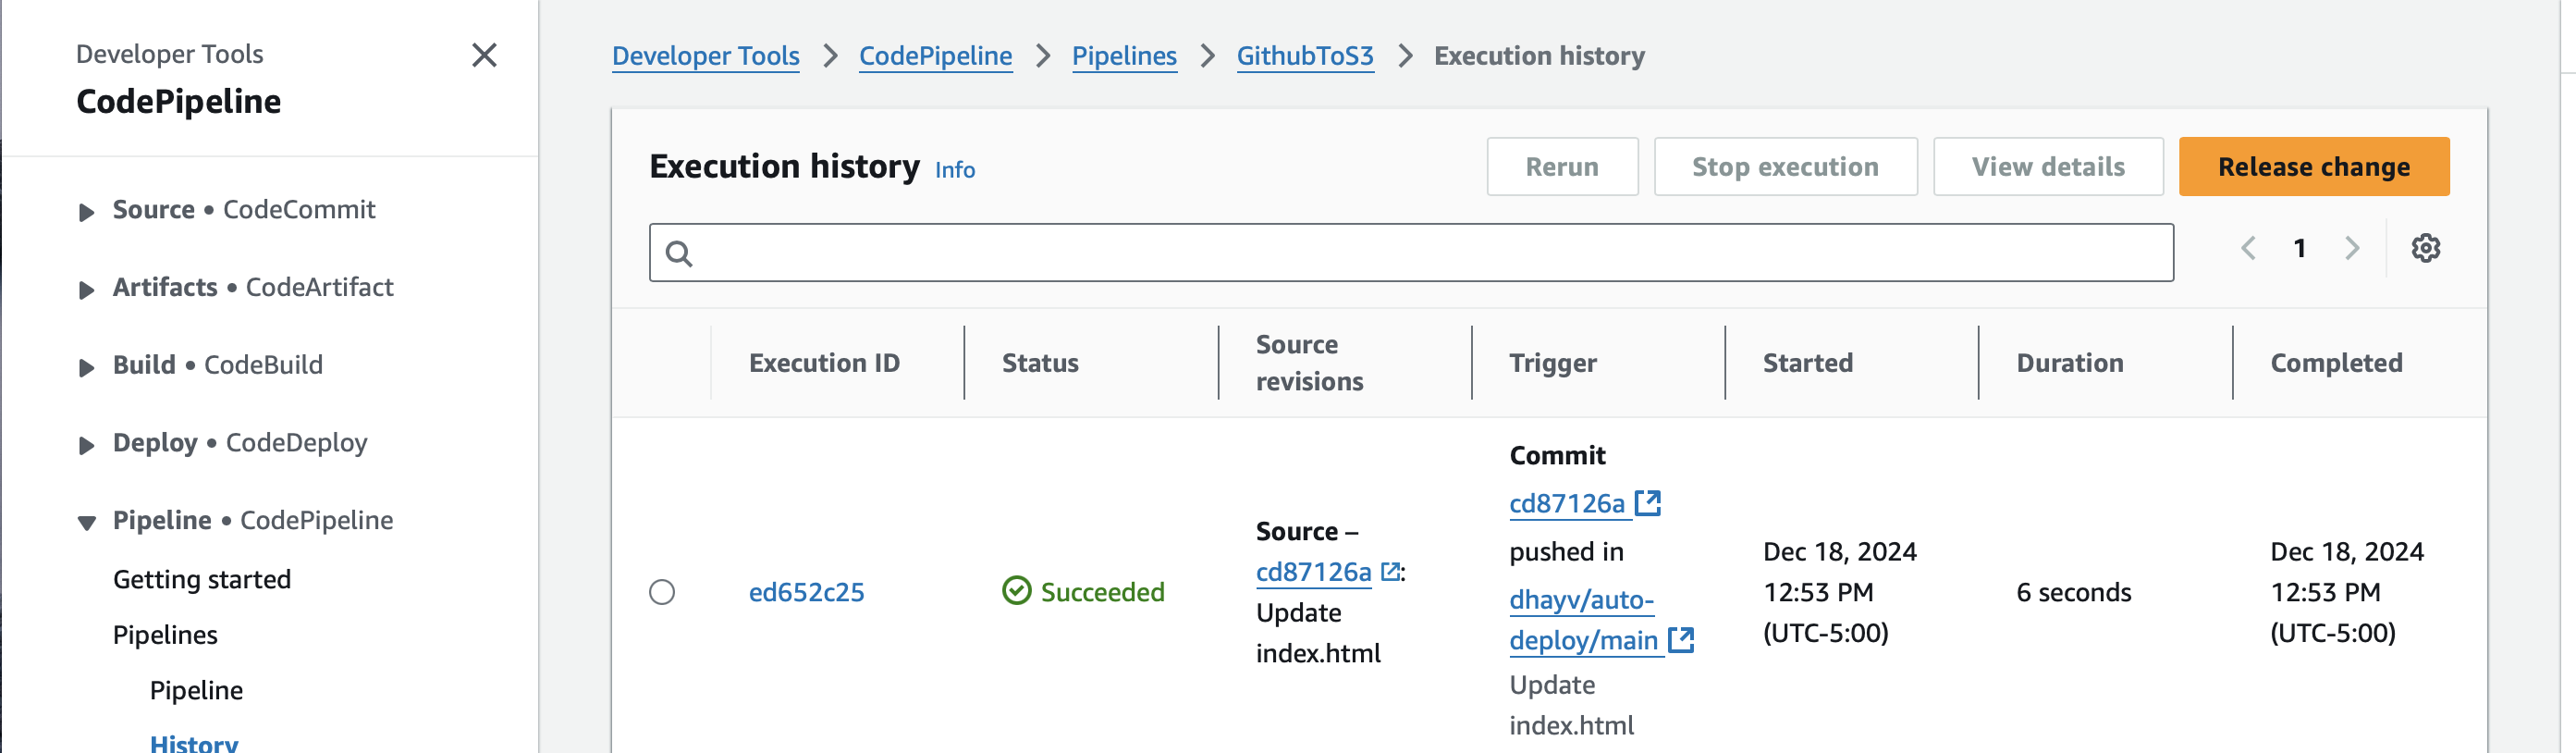
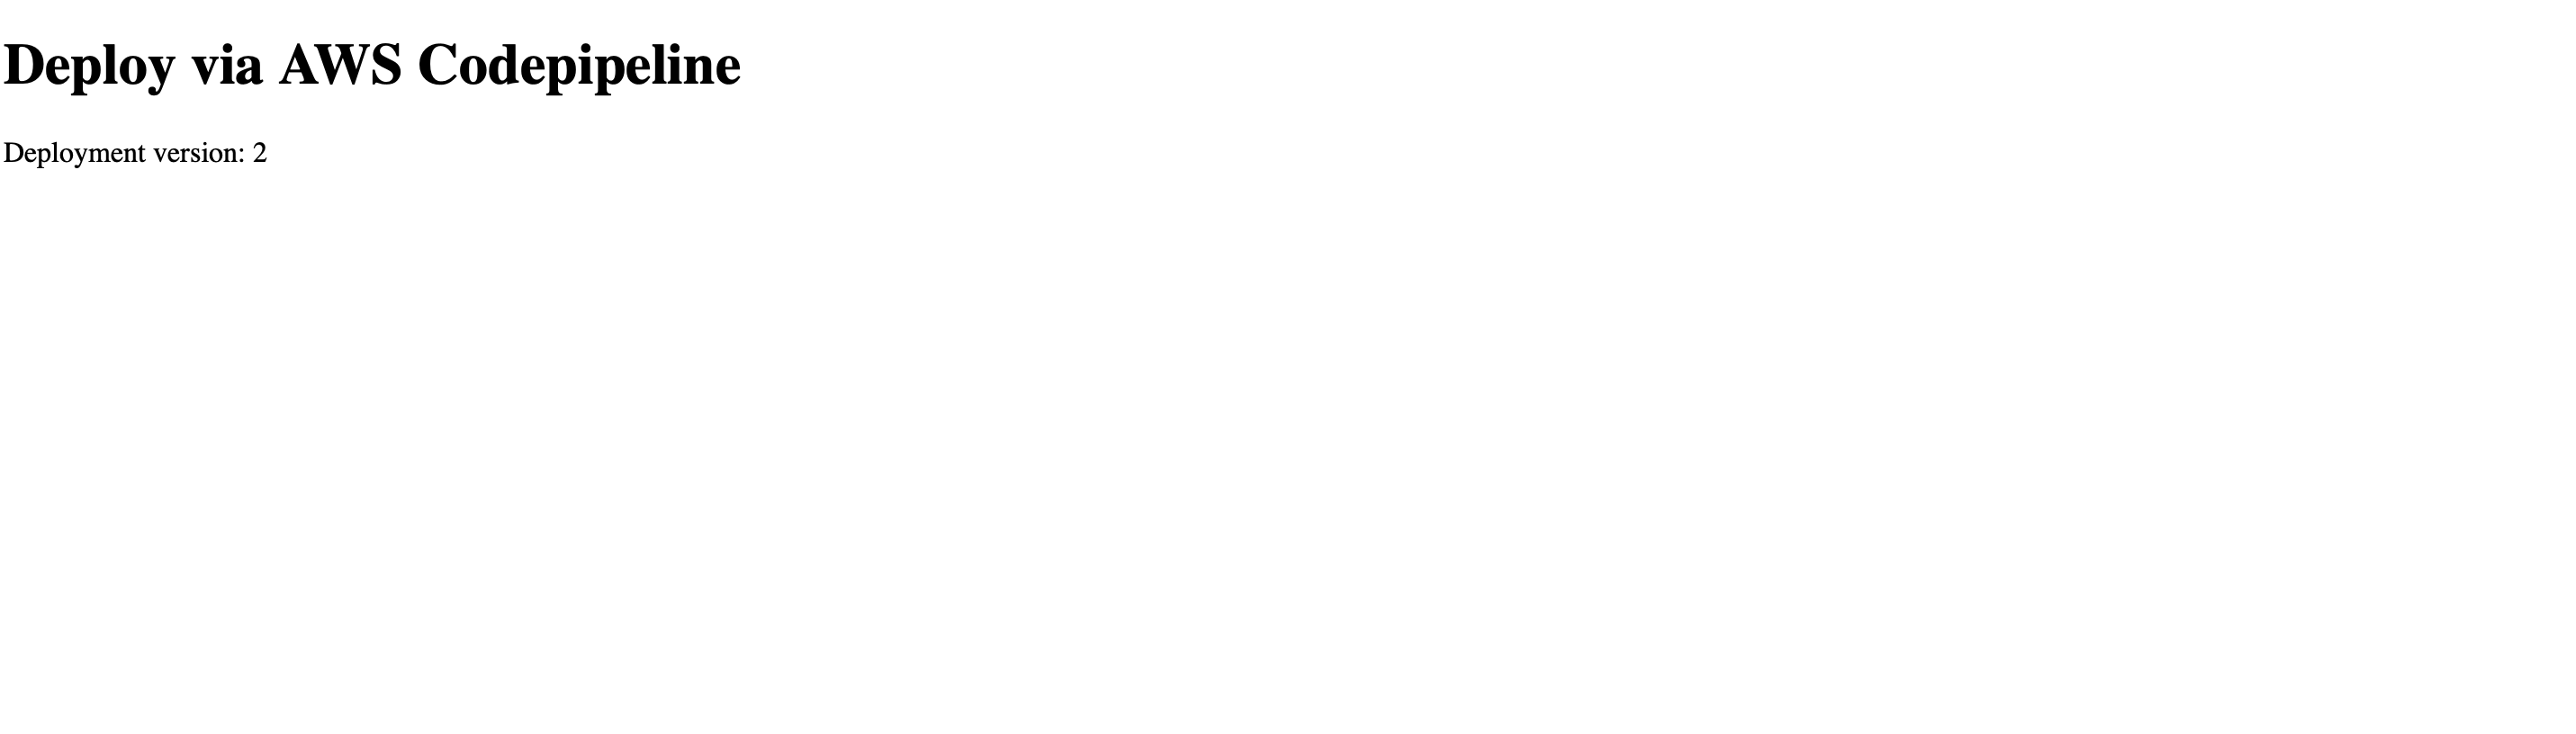
View the updated site reflecting the changes:
Summary: Automated S3 Deployment With CodePipeline
By following this guide, you’ve successfully set up an automated, secure, and efficient deployment pipeline using AWS CodePipeline, S3 static website hosting, and GitHub. This zero-touch solution not only streamlines your deployment process but also enhances security, provides version control, and ensures high availability during peak traffic periods.